
Introduction
It’s critical to explore how technology will affect the future as it grows more pervasive in our daily lives. Artificial intelligence (AI) is one particularly promising topic, which has gained even more importance with the creation of cutting-edge AI-based applications like ChatGPT. We’ll discuss The fundamentals of ChatGPT, and ChatGPT integration with Node and Vue have been explored in this blog post. Let’s explore the benefits of this integration and provide a step-by-step guide for implementing AI Chatbots in your own business.
The ChatGPT tool is significantly increasing the AI business and is currently the fastest-growing consumer application, with over 100 million users in January 2023. The recent ChatGPT integration with Node and Vue has resulted in a new paradigm shift in the market. Going on to the subject, let’s first have a fundamental understanding of the flow of integration using the diagram shown below:
Note: It should be noted that ChatGPT advises against storing tokens client-side and instead suggests using the backend to make ChatGPT API requests.
How Much Does It Cost to Develop a Chatbot like ChatGPT?
What is ChatGPT?
We can refer to ChatGPT as a platform for AI-based chatbots developed by OpenAI that uses the powerful GPT-3 language model. Generative Pre-training Transformer 3, or GPT-3 is a model for natural language processing. It has been trained on a sizable body of information created by humans in a variety of languages and writing styles.
The transformer architecture used by ChatGPT is a neutral network that is efficient at processing sequential data, such as text. It is a potent tool for creating interactive chatbots because it can write, summarise, translate, ask questions, and respond to texts. ChatGPT enables the development of chatbots that may provide consumers with a genuine conversational experience. Chatbots are adaptable and simple to incorporate into platforms and apps. The development of interactive chatbots with the ability to provide customized user experiences is made possible by ChatGPT.
What is Node.js development?
A well-liked JavaScript runtime environment called Node js development enables programmers to create scalable and fast apps. As it enables developers to write server-side code in JavaScript, which is also used for client-side scripting, it is very helpful for developing server-side apps.
With its built-in modules and APIs, Node.js, based on the V8 JavaScript engine used by Google Chrome, makes it simple to create complicated apps. Also, because of its high level of modularity, it is simple to combine with other technologies and frameworks.
What is Vue.js development?
A progressive JavaScript framework for creating user interfaces is called Vue js development. It offers a variety of tools and features, including reactive data binding, components, and routing, that make it simple to create complex and dynamic applications.
Vue.js offers a straightforward and natural approach to maintaining state and handling user interactions, making it especially helpful for creating single-page applications. It is also quite adaptable, making combining various frameworks and technologies simple.
8 Benefits of Integrating ChatGPT with Node.js and Vue.js
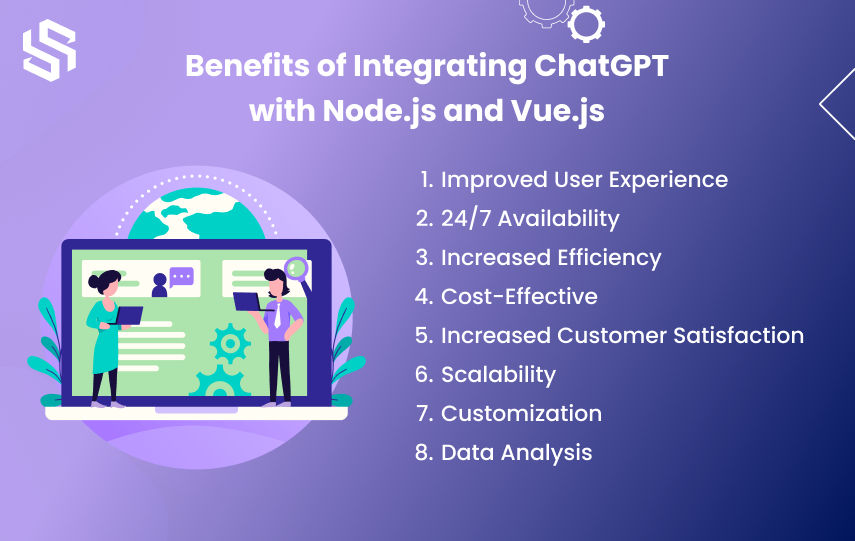
Integrating ChatGPT with Node.js and Vue.js provides a range of benefits for businesses that want to automate their customer service operations. Some of the key benefits of this integration include:
Improved User Experience:
ChatGPT’s natural language processing skills, along with Node.js and Vue.js’s real-time capabilities, produce a user-friendly and smooth chatbot experience.
24/7 Availability:
ChatGPT’s ability to work 24/7 ensures that customers can get their queries resolved at any time, increasing customer satisfaction and reducing workload for businesses.
Increased Efficiency:
ChatGPT’s capacity to comprehend and react to user inquiries lessens the need for human interaction, enhancing efficiency for firms.
Cost-Effective:
Integrating ChatGPT with Node.js and Vue.js is cost-effective compared to hiring additional customer service personnel.
Increased Customer Satisfaction:
ChatGPT’s ability to provide quick and accurate responses to customer queries results in increased customer satisfaction, leading to customer loyalty and repeat business.
Scalability:
Node.js’s event-driven architecture supports scaling, allowing businesses to meet rising user demands without suffering system slowdowns or crashes.
Customization:
The chatbot UI may be easily customized with Vue.js’s component-based architecture to ensure that it matches a company’s brand identity and aesthetic.
Data Analysis:
ChatGPT generates data that can be analyzed to identify trends and patterns, allowing businesses to make data-driven decisions.
How to Integrate ChatGPT with Node.js and Vue.js
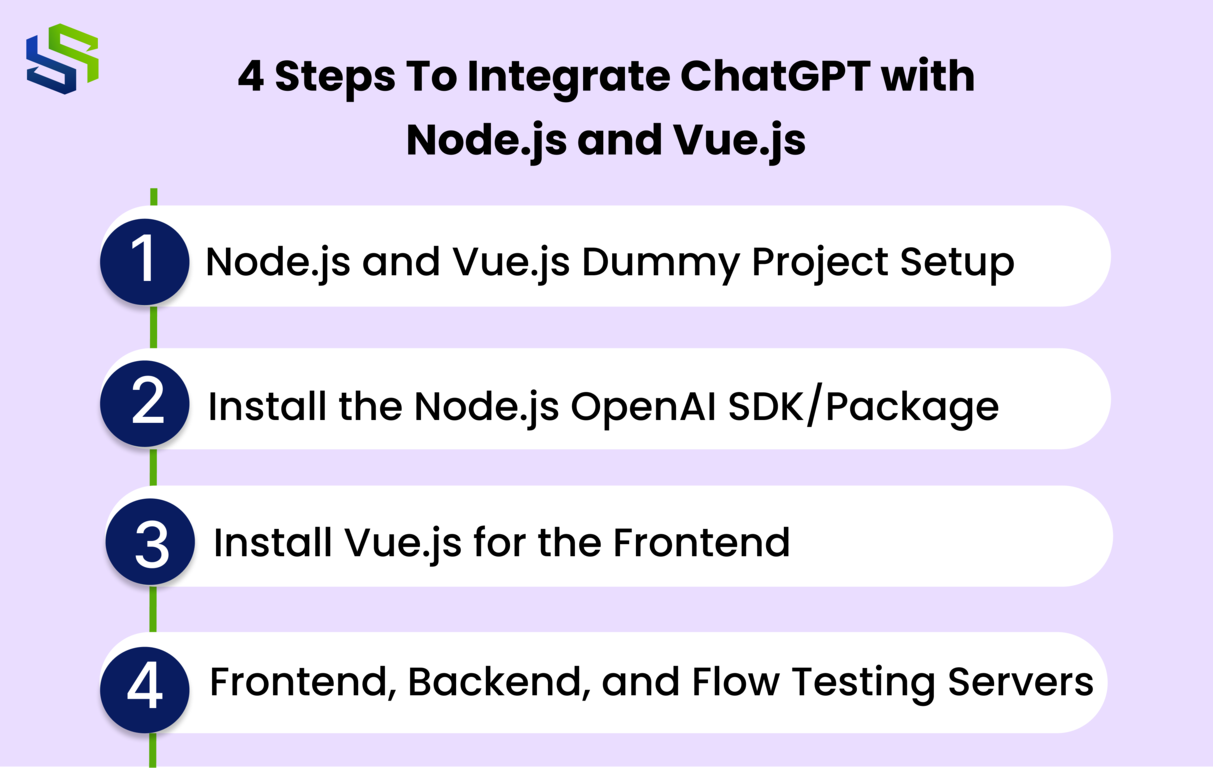
Integrating ChatGPT with Node.js and Vue.js is a straightforward process that involves the following steps:
Step 1: Node.js and Vue.js Dummy Project Setup for ChatGPT Integration
The ChatGPT integration with Node.js and Vue.js project uses Node.js as the backend and Vue.js as the frontend. This project involves a straightforward backend, for which we have set up just one API with a POST request. With this endpoint, we will use ChatGPT to connect the front-end and the back-end. The example of the backend is provided here, and we can also see the sole controller that provides the requested data.
Moving on to the front-end, it is likewise fundamental in nature and only requires one component, the “ChatBox,” which is in charge of sending messages to ChatGPT and receiving the appropriate responses, as shown in the illustration provided below:
Visit the GitHub Repository to view the code references.
Do you need ChatGPT to be effortlessly included in your project by a dedicated Vue developer?
You may improve the usability, interactivity, and user experience of your app by integrating ChatGPT with the aid of our Vue developer.
Let’s move on and configure the OpenAI package for Node.js.
Step 2: Install the Node.js OpenAI SDK/Package
OpenAI is a package that controls all communication between the User and the ChatGPT server in your ChatGPT Integration with Node and Vue. Also, it is the official ChatGPT package; to learn more and go further into the specifics, consult the documentation.
Next, let’s use the following command to install the OpenAI package in the backend:
Create a fresh project folder first:
$ mkdir chatgpt-nodejs
Then enter the project folder that was just made:
$ cd chatgpt-nodejs
Let’s use the next command to generate a package.json file:
$ npm init -y
The openai npm package can now be installed:
$ npm init -y
Now, Let’s set up chatGpt.controller.js so that it can interact with the ChatGPT APIs on the backend as seen below:
// chatGpt.controller.js
const {Configuration, OpenAIApi} = require(‘openai’)
const askToChatGpt = async function (req, res) {
/** * 1. Create/configure OpenAI Instance */ const openAIInstance = await _createOpenAIInstance()
/** * 2. Let’s talk to chatGPT */ await openAIInstance.createCompletion({ model: ‘text-davinci-003’, prompt: req.body.message, temperature: 0, max_tokens: 500 }) .then((response) => { const repliedMessage = response.data.choices[0].text res.send({from: ‘chatGpt’, data: repliedMessage}) }) .catch((error) => { //Report error console.log(‘Error ‘, error) }); }
const _createOpenAIInstance = async () => { const conf = await new Configuration({ apiKey: process.env[‘CHATGPT_TOKEN’] }) return await new OpenAIApi(conf) }
module.exports = { askToChatGpt }
Keep the ChatGPT token in Node.js’.env file under the CHATGPT TOKEN key. The.env file can be created, the.env.example’s content copied and pasted, and the token changed. Create the token from the ChatGPT account’s profile area after that.
The only thing to remember is to include the ChatGPT token under the key CHATGPT TOKEN in the Node.js.env file. Additionally, you can make an a.env file, duplicate the example’s content, and replace the token. The ChatGPT account’s profile section is where you may create your token.
Our primary logic is now ready for testing; to do so, send a request to http://localhost:3000/ask-to-chat-gp with your message included. ChatGPT will respond with the relevant information.
The frontend makes requests to the Node.js server as the following step after the primary logic.
Step 3: Install Vue.js for the Frontend
Therefore, we are using Vue.js for the front end. But you’re free to use whatever alternative frontend you desire, whether it’s React, Angular, Native HTML, JavaScript, or something else entirely. The main goal of this frontend is to send a simple request to the aforementioned API endpoint.
In this case, we have developed a ChatBox.Vue component located in the /src/components directory that is in charge of interacting with the backend; we are utilizing the Axios API call in this instance. The procedure for sending requests to our backend is shown below, and the logic is available in the previously mentioned GitHub repository.
methods: { async sendMessage (message) { this. messages. push ({ from: ‘user’, data: message }) await axios.post(‘http://localhost:3000/ask-to-chat-gpt’, { message: message }) .then( (response) => { this. messages. push response. data) }) } }
Our ChatBox.vue component looks like this:
<template> <div> <h1>Ask to chatGpt</h1> <input v-model=”currentMessage” type=”text”> <span><button @click=”sendMessage(currentMessage)”>Ask</button></span> <div> <template v-for=”message in messages”> <div :class=”message.from==’user’ ? ‘messageFromUser’ :’messageFromChatGpt'” :key=”message” v-html=”message.data”></div> </template> </div> </div> </template>
<!– Add “scoped” attribute to limit CSS to this component only –> <style scoped> input { width: 300px; padding: 10px; }
button { height: 40px; background-color: powderblue; padding: 10px; }
.messageBox { height: 500px; background-color: gainsboro; /* margin-left: 10%; margin-right: 10%; */ margin: 0 20% 0 20%; margin-top: 20px; padding: 5%; }
.messageFromUser { text-align: right; background-color: aliceblue; border-radius: 10px; padding: 10px; margin-top: 15px; margin-bottom: 15px; width: 30%; margin-left: 70%; }
.messageFromChatGpt { text-align: left; background-color: antiquewhite; border-radius: 10px; padding: 10px; margin-top: 15px; margin-bottom: 15px; width: 30%; margin-right: 70%; } </style>
We have finished writing the code, so let’s test it now.
Do you want to create an app that is simple to update and maintain?
To keep your app current, our Node.js developers use the most recent methods and tools. Hire Node.js developer to help future-proof your project.
Step 4: Frontend, Backend, and Flow Testing Servers
Your work is finished once you have served the projects. Here, the frontend and backend have been served separately at http://localhost:8080 and http://localhost:3000, respectively. Both the frontend and the backend can be served using the same commands.
For Frontend:
npm run serve
For Backend:
node index.js
The following screen will subsequently appear, as shown below:
You can now enter your query in the top input box as shown in the image above to receive the required response from ChatGPT.
Finally, Your Node.js and Vue ChatGPT Integration has been finished successfully. Understand the fundamentals of ChatGPT services as explained by our knowledgeable and experienced and dedicated OpenAI developers to ensure optimal operation.
How Much Does it Cost to Hire Full Stack Developer in 2023
ChatGPT Services: Understanding the Basic Terminologies
You can see in the image below that we specified a few properties while sending a request to the ChatGPT services from the backend (chatGpt.controller.js). The value of this parameter affects the response we receive from the ChatGPT APIs, so let’s take a closer look at each one.
await openAIInstance.createCompletion({ model: ‘text-davinci-003’, prompt: req.body.message, temperature: 0, max_tokens: 500 }) .then {(response) => { const repliedMessage = response.data.choices[0].text res.send({from: ‘chatGpt’, data: repliedMessage}) }) .catch( (error) => { //Report error console. log(‘Error ‘, error) });
Model
You may have seen that we utilized a model called “text-davinci-003,” which is what it is called. Since that ChatGPT is trained using a sizable amount of data, you can select the model you want to employ at the time of the request based on your particular use case.
Prompt
The question we need to ask ChatGPT in this case is contained or implied by the prompt, which according to this project is a message requested from the client side.
Temperature
You can choose your preferred level of diversity based on your use case. The temperature here refers to and is accountable for the diversity of answers. Predictable results are produced by maintaining a value below 1.0.
Max_tokens
It defines the number of words, punctuation, and other elements that make up the responses’ length.
AI Marketing Tools to Grow Your Business
Conclusion
In the world of software development, the integration of ChatGPT with Node.js and Vue.js has paved the way for the development of powerful AI chatbots. By leveraging artificial intelligence development services, businesses can create intelligent chatbot solutions that enhance customer engagement and streamline communication processes.
With the expertise of a Vue.js development company, businesses can create visually appealing and user-friendly interfaces for their chatbots, providing a seamless user experience. Meanwhile, hiring Node.js developer or partnering with a Node.js development company ensures robust back-end functionality and efficient handling of chatbot requests.
The integration of ChatGPT with Node.js and Vue.js offers immense potential for businesses looking to enhance their customer support and automate routine tasks. By leveraging these technologies and hiring Vue.js developers and Node.js developers, businesses can unlock the full potential of AI chatbots and gain a competitive edge in their respective industries.
If you are a business owner who plans to integrate ChatGPT with your chatbot, hire full stack developers to assist you in every step of the web application development process and to give you the confidence you need to move forward with your next project.


