Angular has evolved as one of the most extensively used frameworks in the web app development market in recent years. Its popularity among software engineers can be attributed to several factors. As an open-source framework, Angular provides developers with the flexibility to tweak and enhance its functions to meet the specific needs of their projects. This openness has fostered a vibrant Angular community that continually contributes to the framework’s advancement. If you need expert assistance, consider utilizing AngularJS development services or hire AngularJS experts to leverage the full potential of this powerful framework for your web development needs.
But, Why choose Angular?
As a TypeScript-based front-end framework, Angular offers a structured and type-safe approach to building web applications. TypeScript, being a superset of JavaScript, adds static typing and advanced tooling capabilities, enabling developers to catch errors early in the development process and write more maintainable code. This helps reduce bugs and enhances the overall developer experience.
Angular benefits from the expertise and resources of a tech giant. Google’s backing ensures continuous updates, improvements, and support for the framework, making it a reliable choice for enterprise-level projects. Additionally, Angular’s strong focus on performance optimization and scalability make it suitable for building large-scale applications.
Let’s take a moment to explore some key advantages that make Angular stand out from other frameworks. It offers distinct advantages that set it apart. Angular’s comprehensive feature set includes built-in tools for data binding, form handling, and routing, among others. This eliminates the need to rely on external libraries or plugins, streamlining the development process. Furthermore, Angular’s adherence to the Model-View-Controller (MVC) architectural pattern allows for better code organization and maintainability, making it a robust choice for complex application development.
For starters, its latest version, Angular 16, introduces a host of advanced features, enhanced server-side rendering and hydration capabilities to improve application performance and user experience. Furthermore, Angular 16 includes breakthroughs in areas such as code splitting, lazy loading, and enhanced build and compilation procedures, which boost developer productivity even further.
Now that you understand the relevance and benefits of Angular, you can begin the installation procedure. Follow the instructions below to get Angular working on your Windows 10 laptop in no time. Prepare to unleash your potential and go on an exciting web development journey with Angular.
Angular vs React: Which One is Best for Your Front-end Development?
How to Install Angular on Windows?
Angular is a powerful and flexible JavaScript framework that allows developers to create dynamic and responsive web applications. With its ability to handle complex and data-intensive applications, it has become a popular choice among developers worldwide.
But, Before we dive into the installation process, it’s important to note that Angular requires Node.js and npm (Node Package Manager) installed on your system. If you don’t have these installed, head over to Node.js website and download the appropriate version for your operating system. Once you have Node.js installed, you will also have npm installed on your system.
Now that we have Node.js and npm installed, we can move on to installing Angular. There are a few steps involved in this process, so let’s get started.
Angular Installation Steps by Steps
It’s crucial to properly install the framework on your local workstation before you begin with Angular.js app development. So let me walk you through the installation process for Angular, step-by-step. Whether you are a beginner or an experienced developer, this steps will help you install Angular and get started with your project.
Step 1: Install Node.js
Node.js is a JavaScript runtime built on Chrome’s V8 JavaScript engine. It allows developers to run JavaScript on the server-side. To install Node.js, go to the official website https://nodejs.org/en/download/current,
On the Node.js homepage, click on the “Downloads” button
You will be presented with two versions: LTS (Long-Term Support) and Current. The LTS version is recommended for most users, as it provides stability and long-term support. Click on the “LTS” button to download the latest LTS version : 20.3.1 installer for Windows.
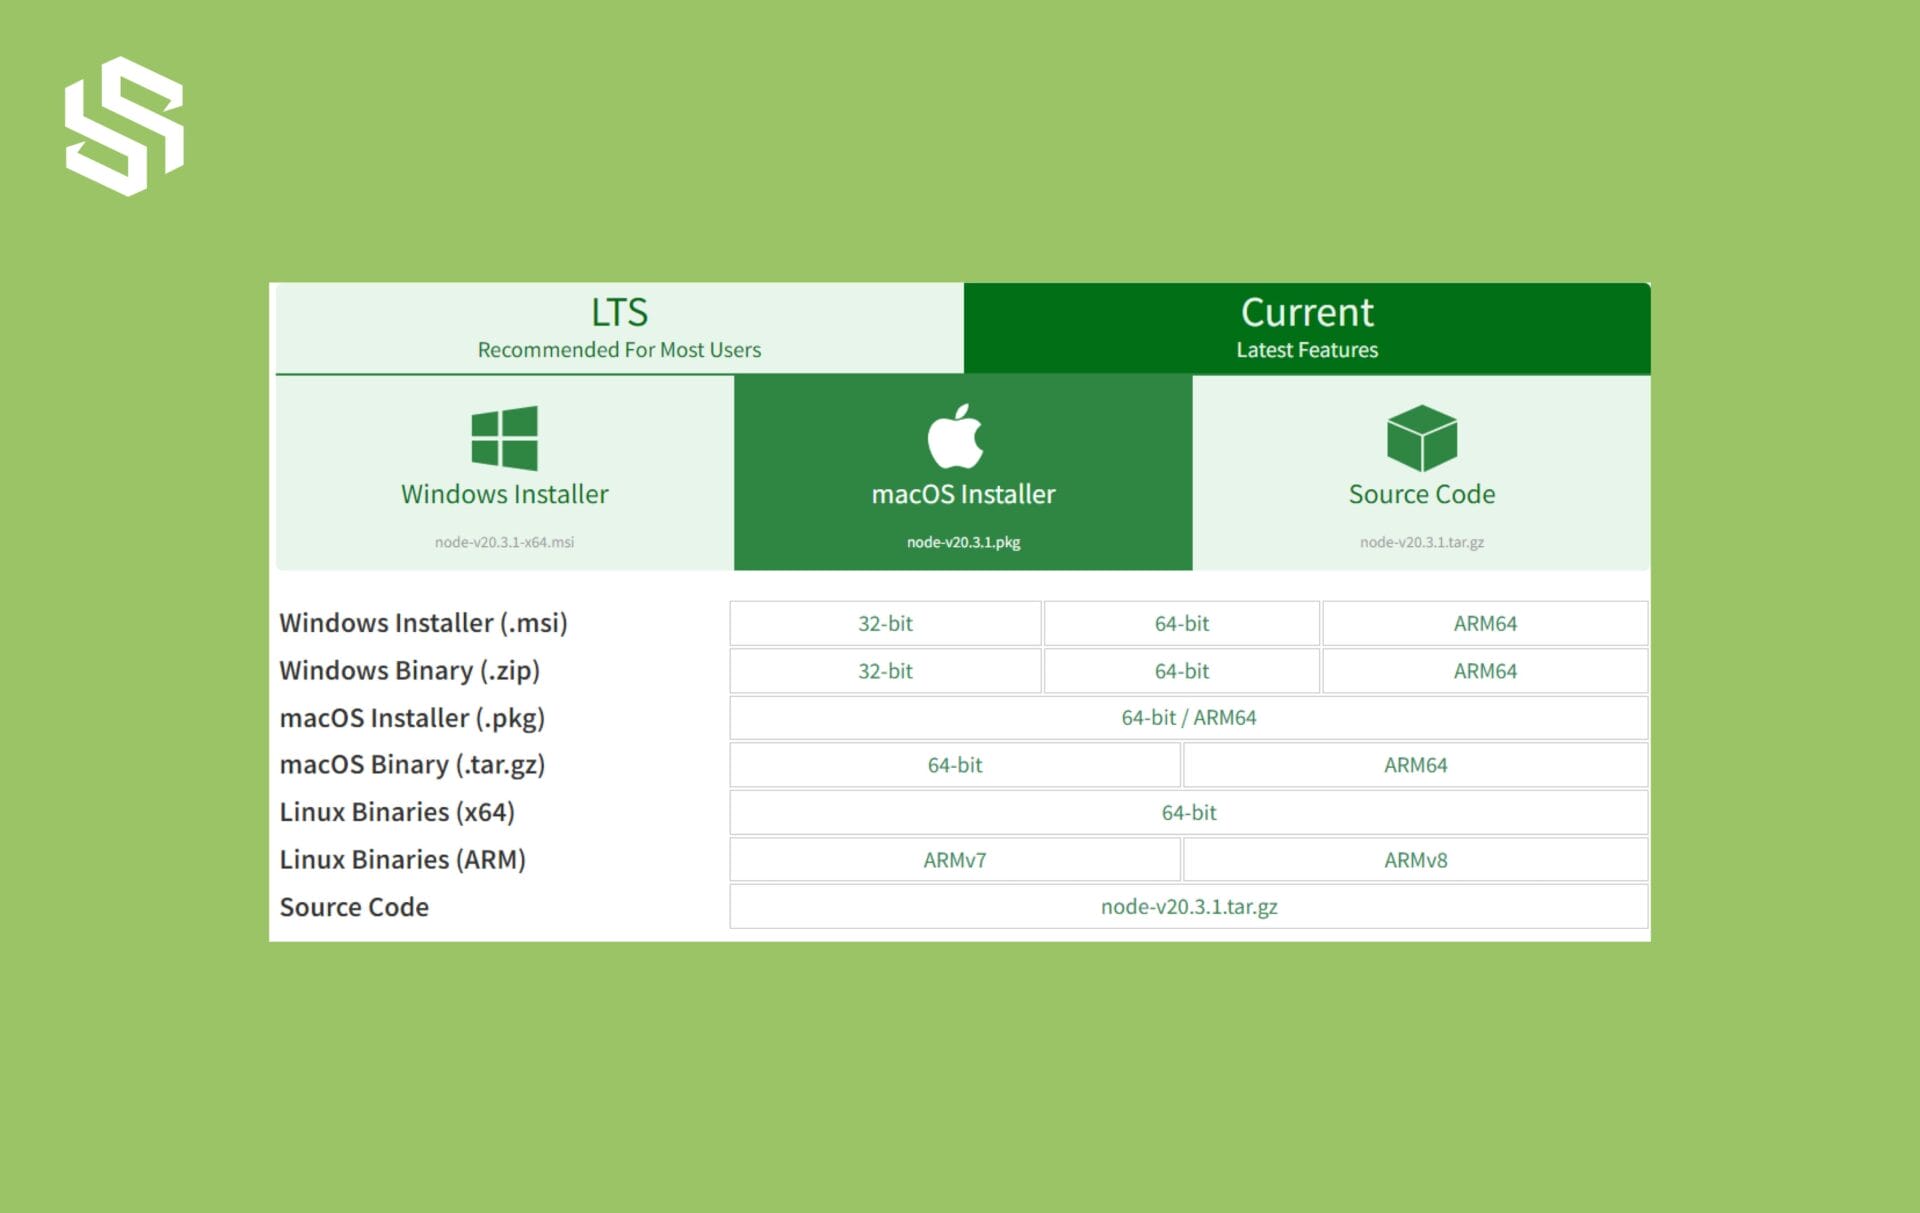
Once the download is complete, locate the downloaded installer file (e.g., node-vxx.x.x-x-x64.msi) on your computer.
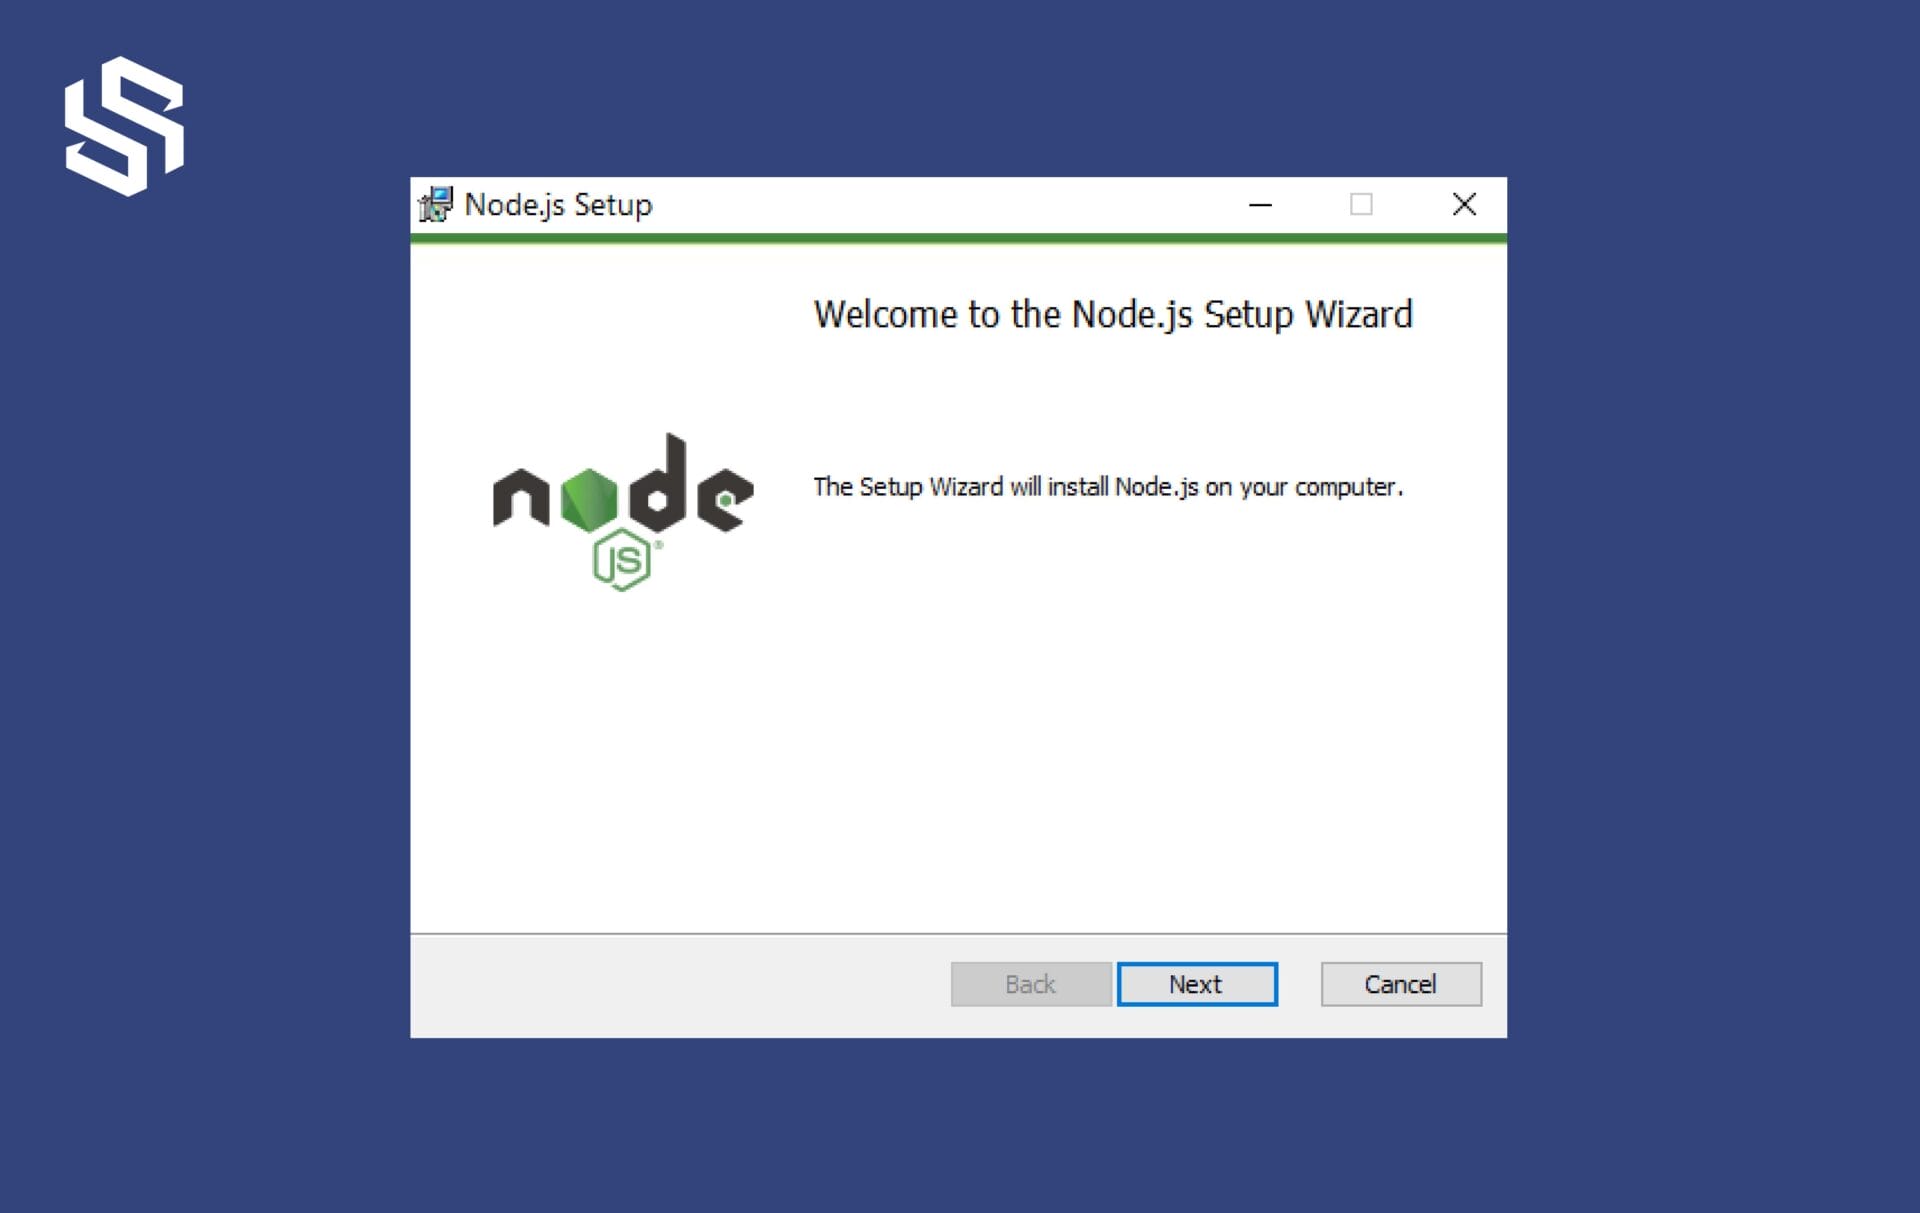
Double-click the installer file to open it.
The Node.js Setup Wizard will appear. Click “Next” to proceed.
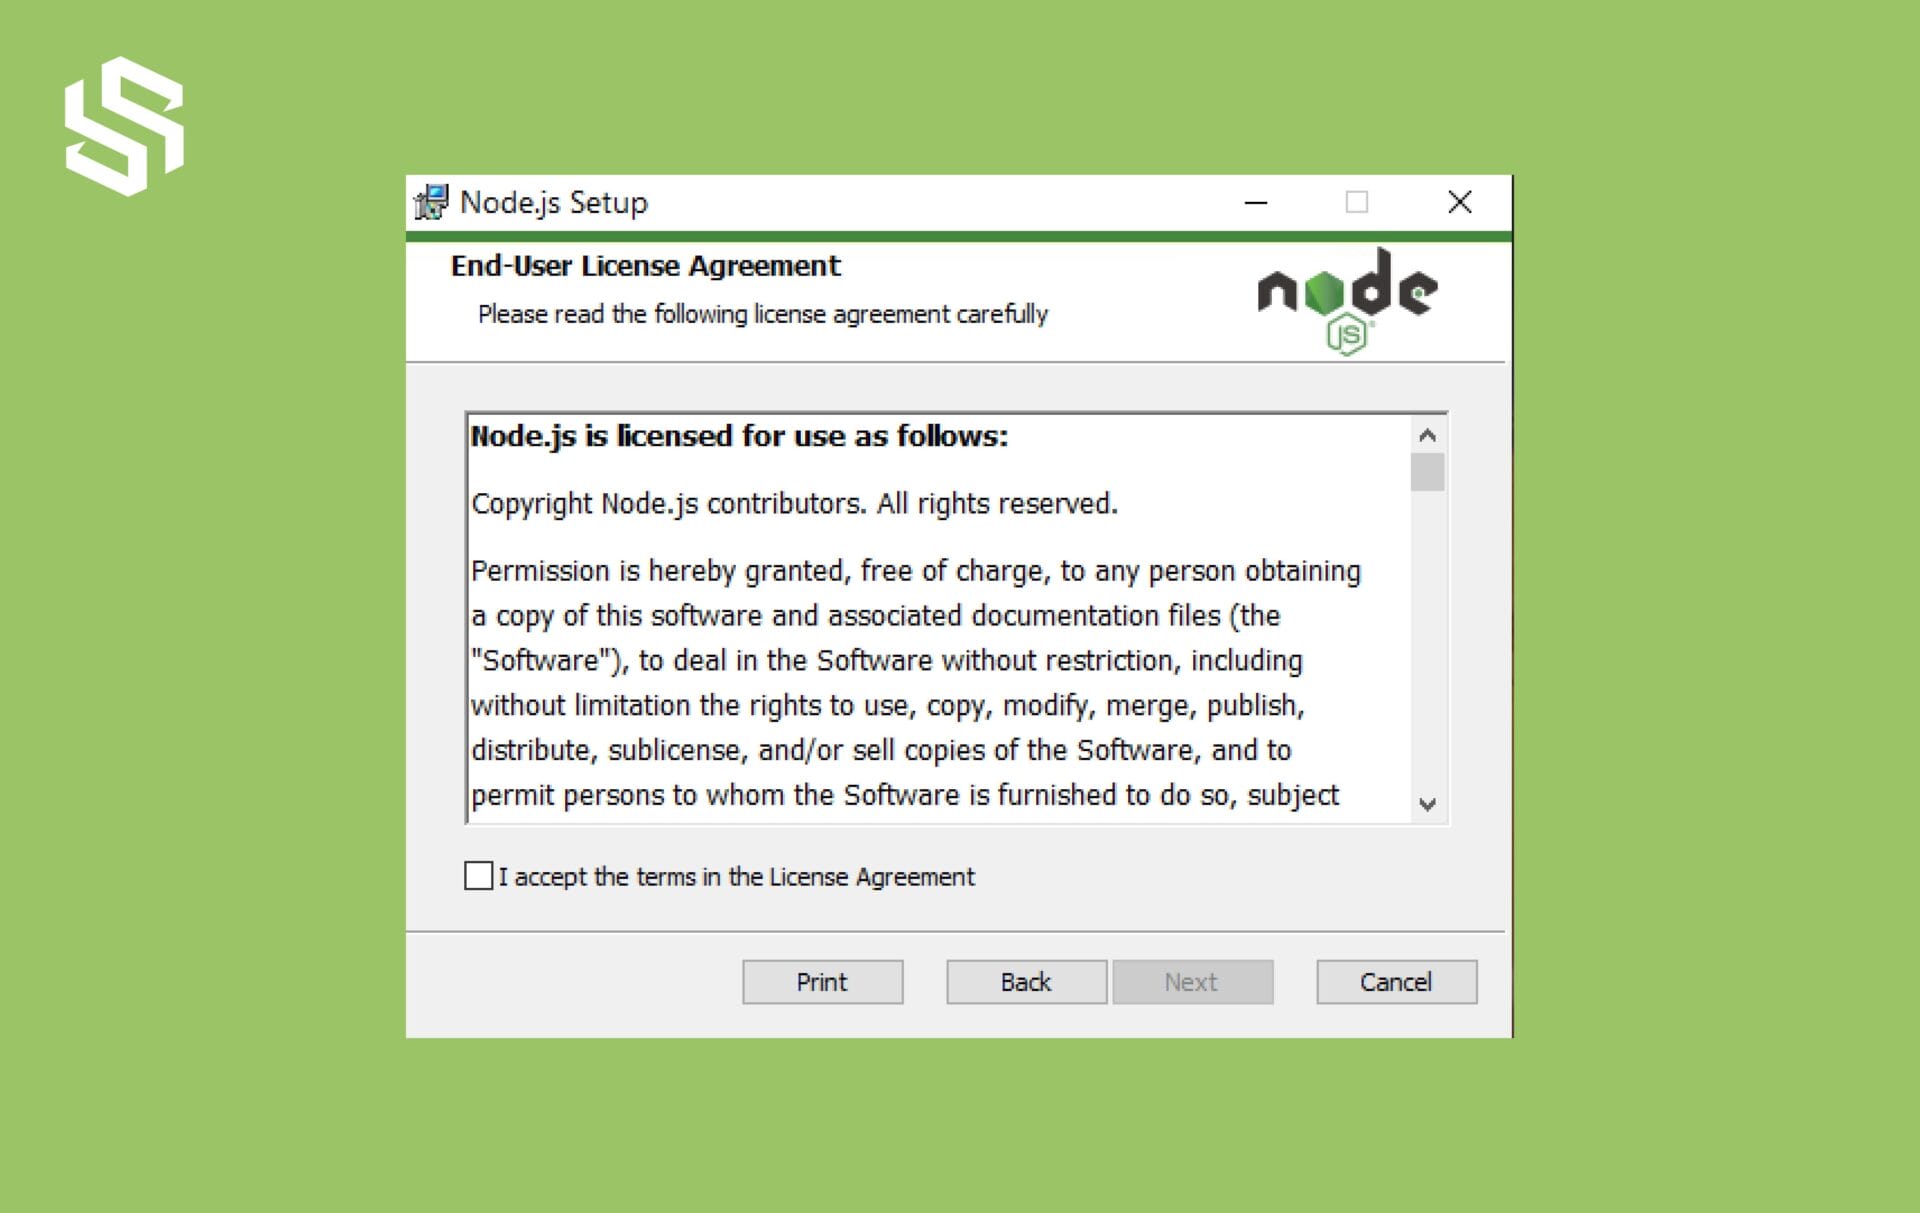
Read and accept the license agreement, then click “Next.”
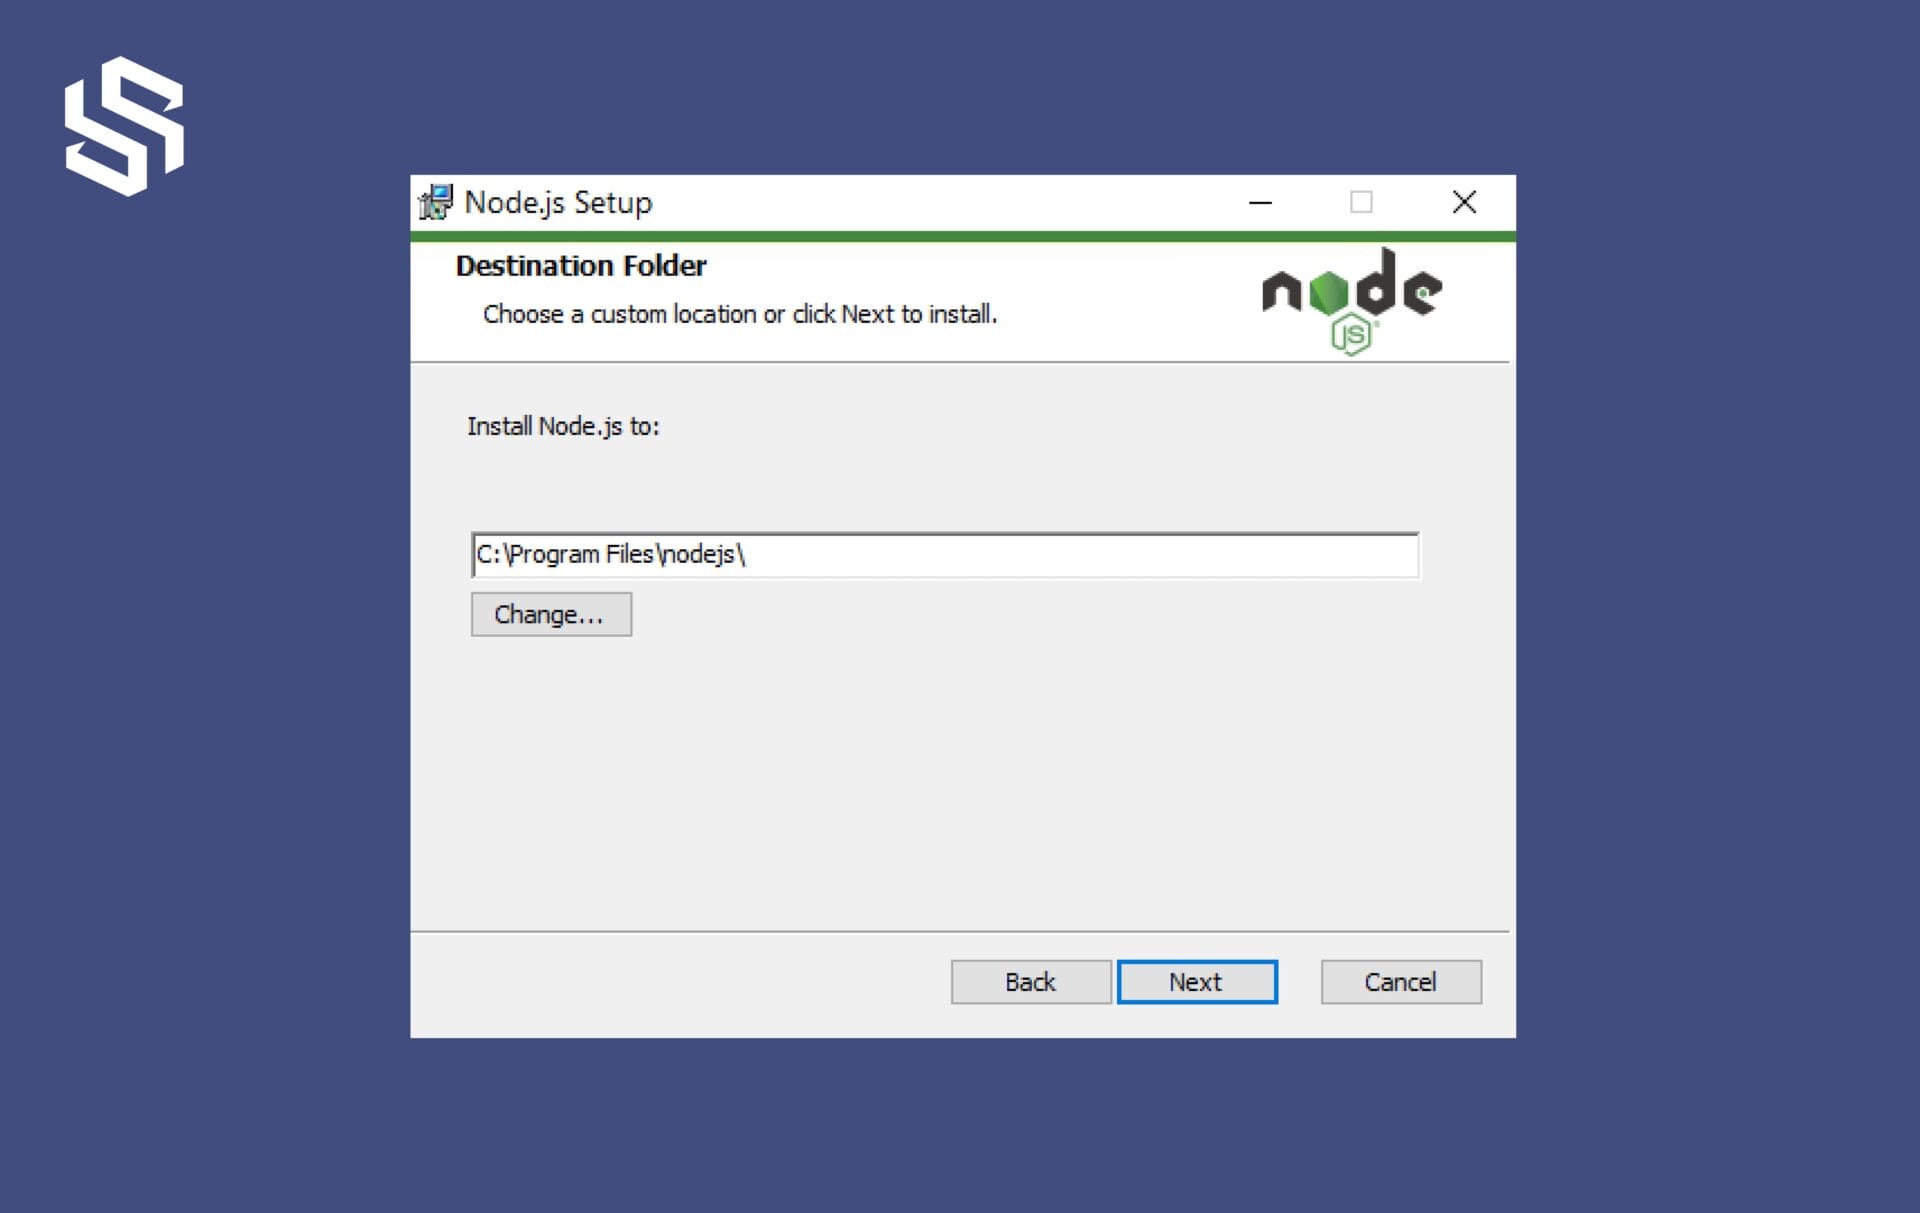
By default, Node.js will be installed in the “Program Files” folder on your system drive. You can change the installation directory if needed, but it’s recommended to keep the default settings. Click “Next.”
On the “Select components” screen, you can choose which components to install. It’s recommended to keep the default selection, which includes the necessary components for most Node.js applications. Click “Next.”
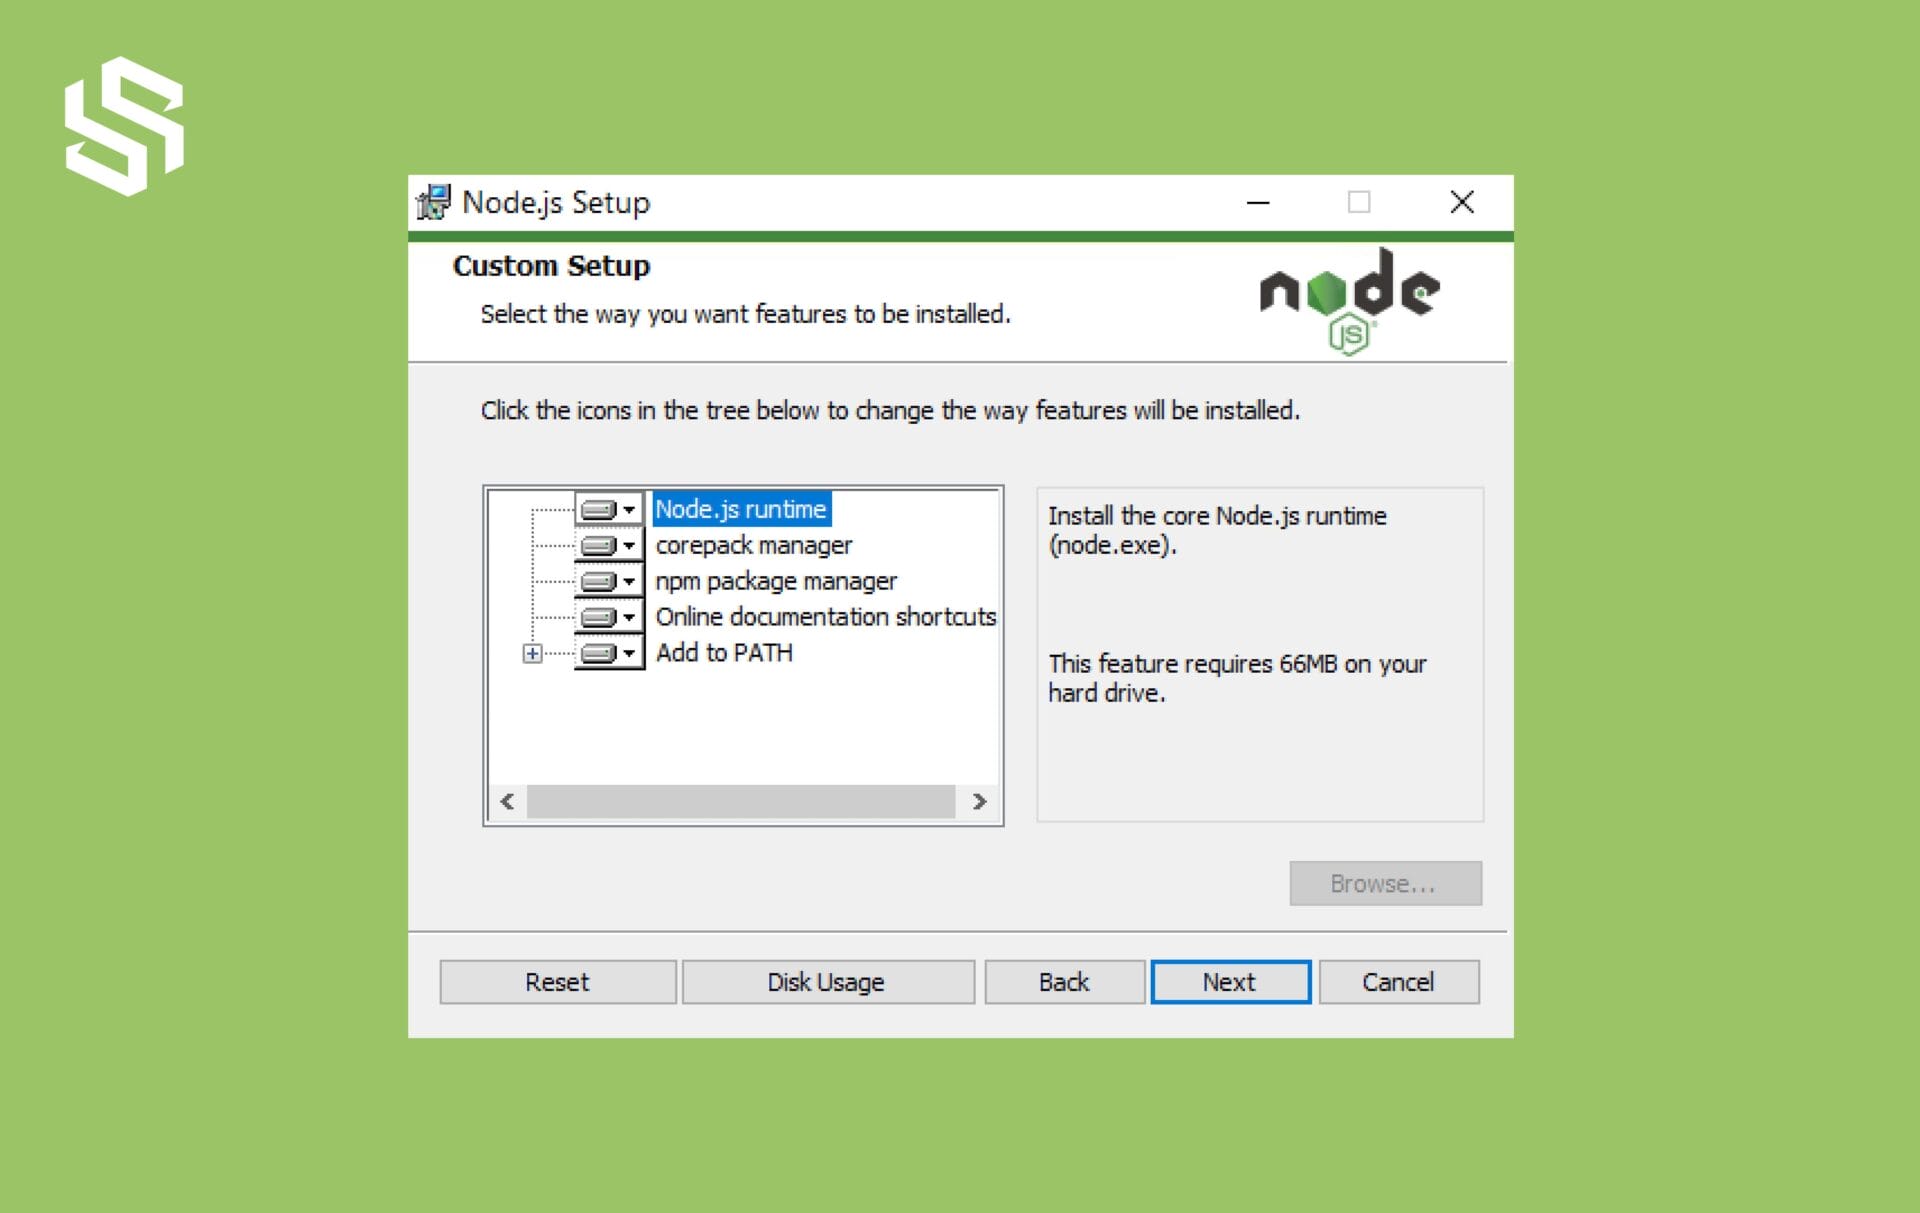
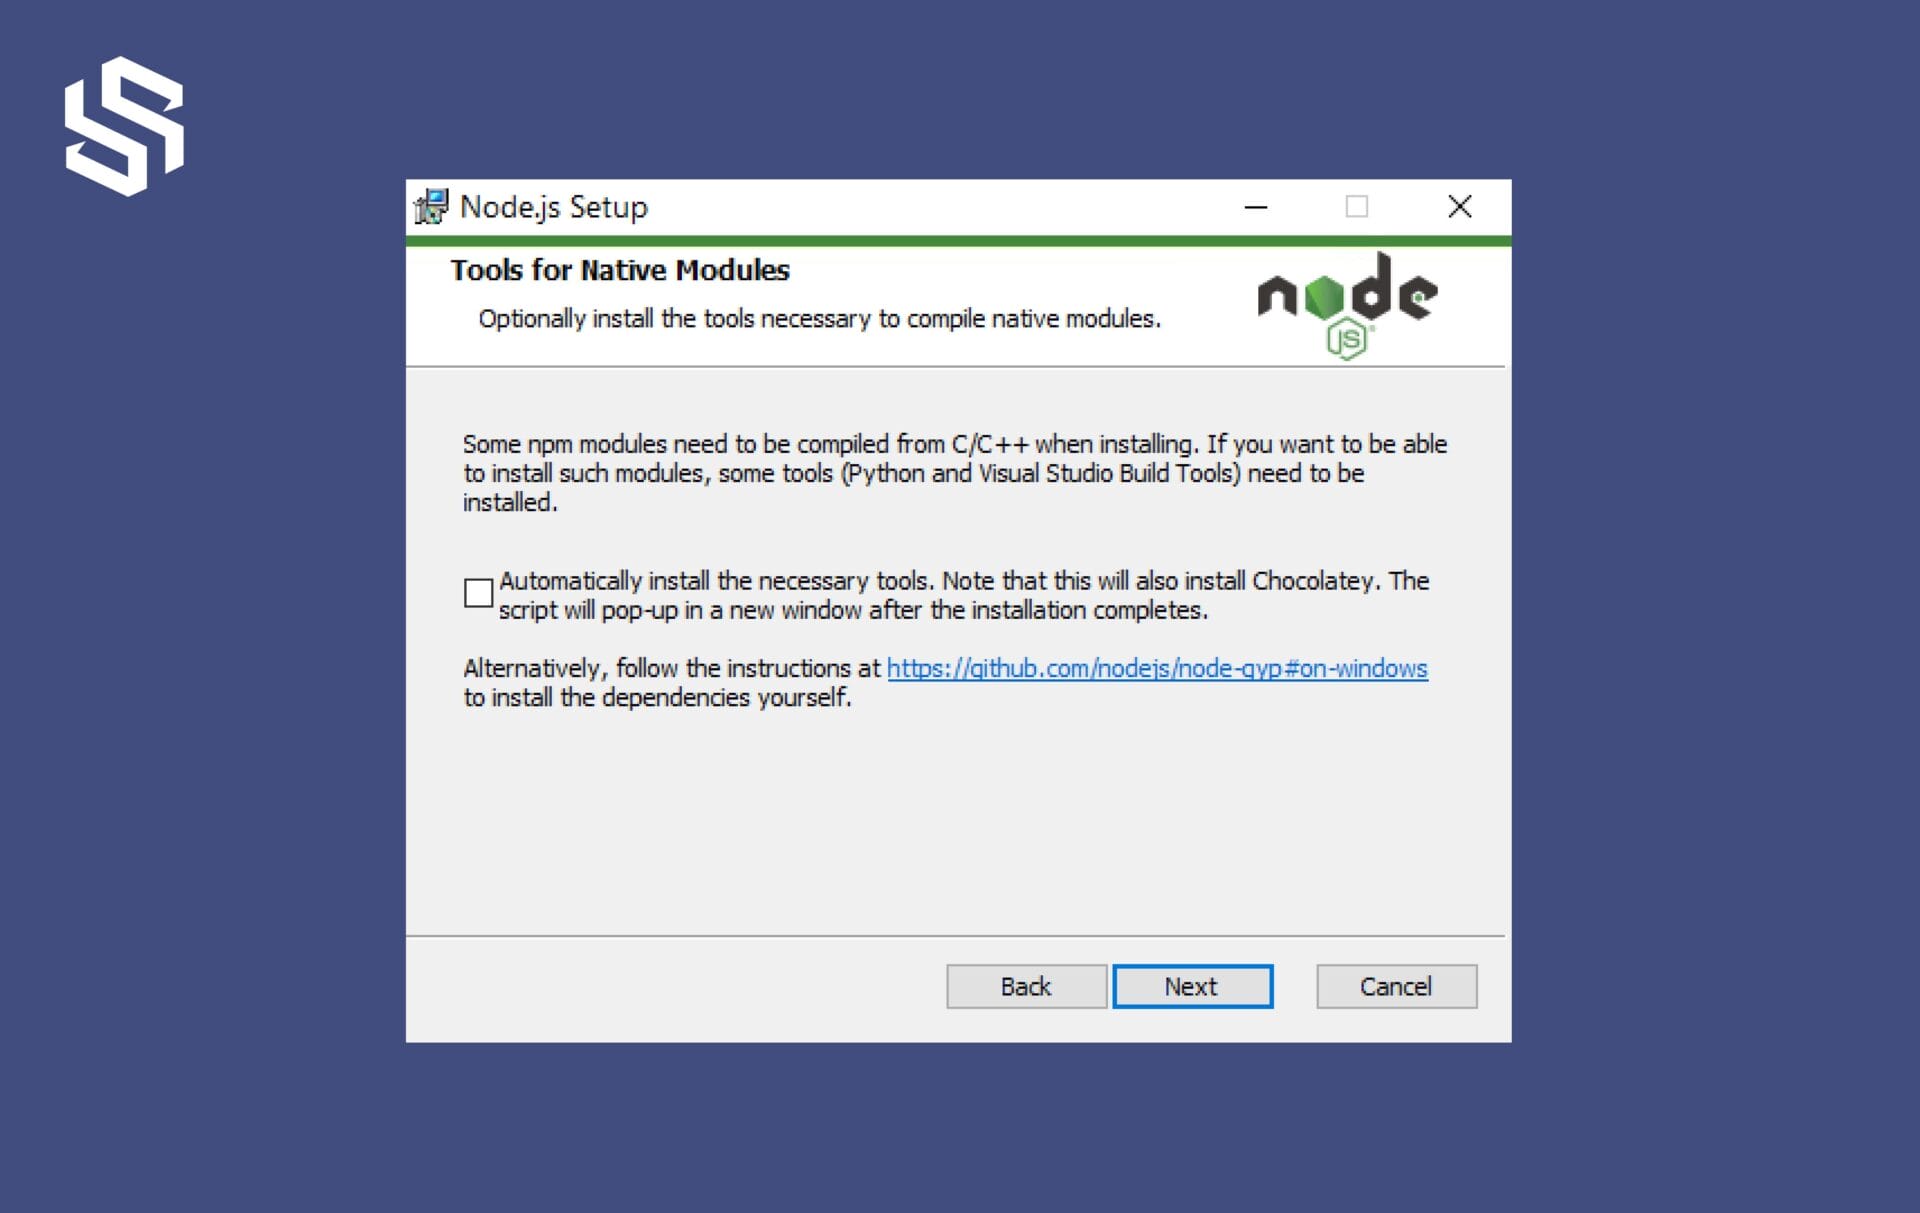
You can skip this step if you prefer. Installing native modules is not required and takes up approximately 3GB of storage on your system.
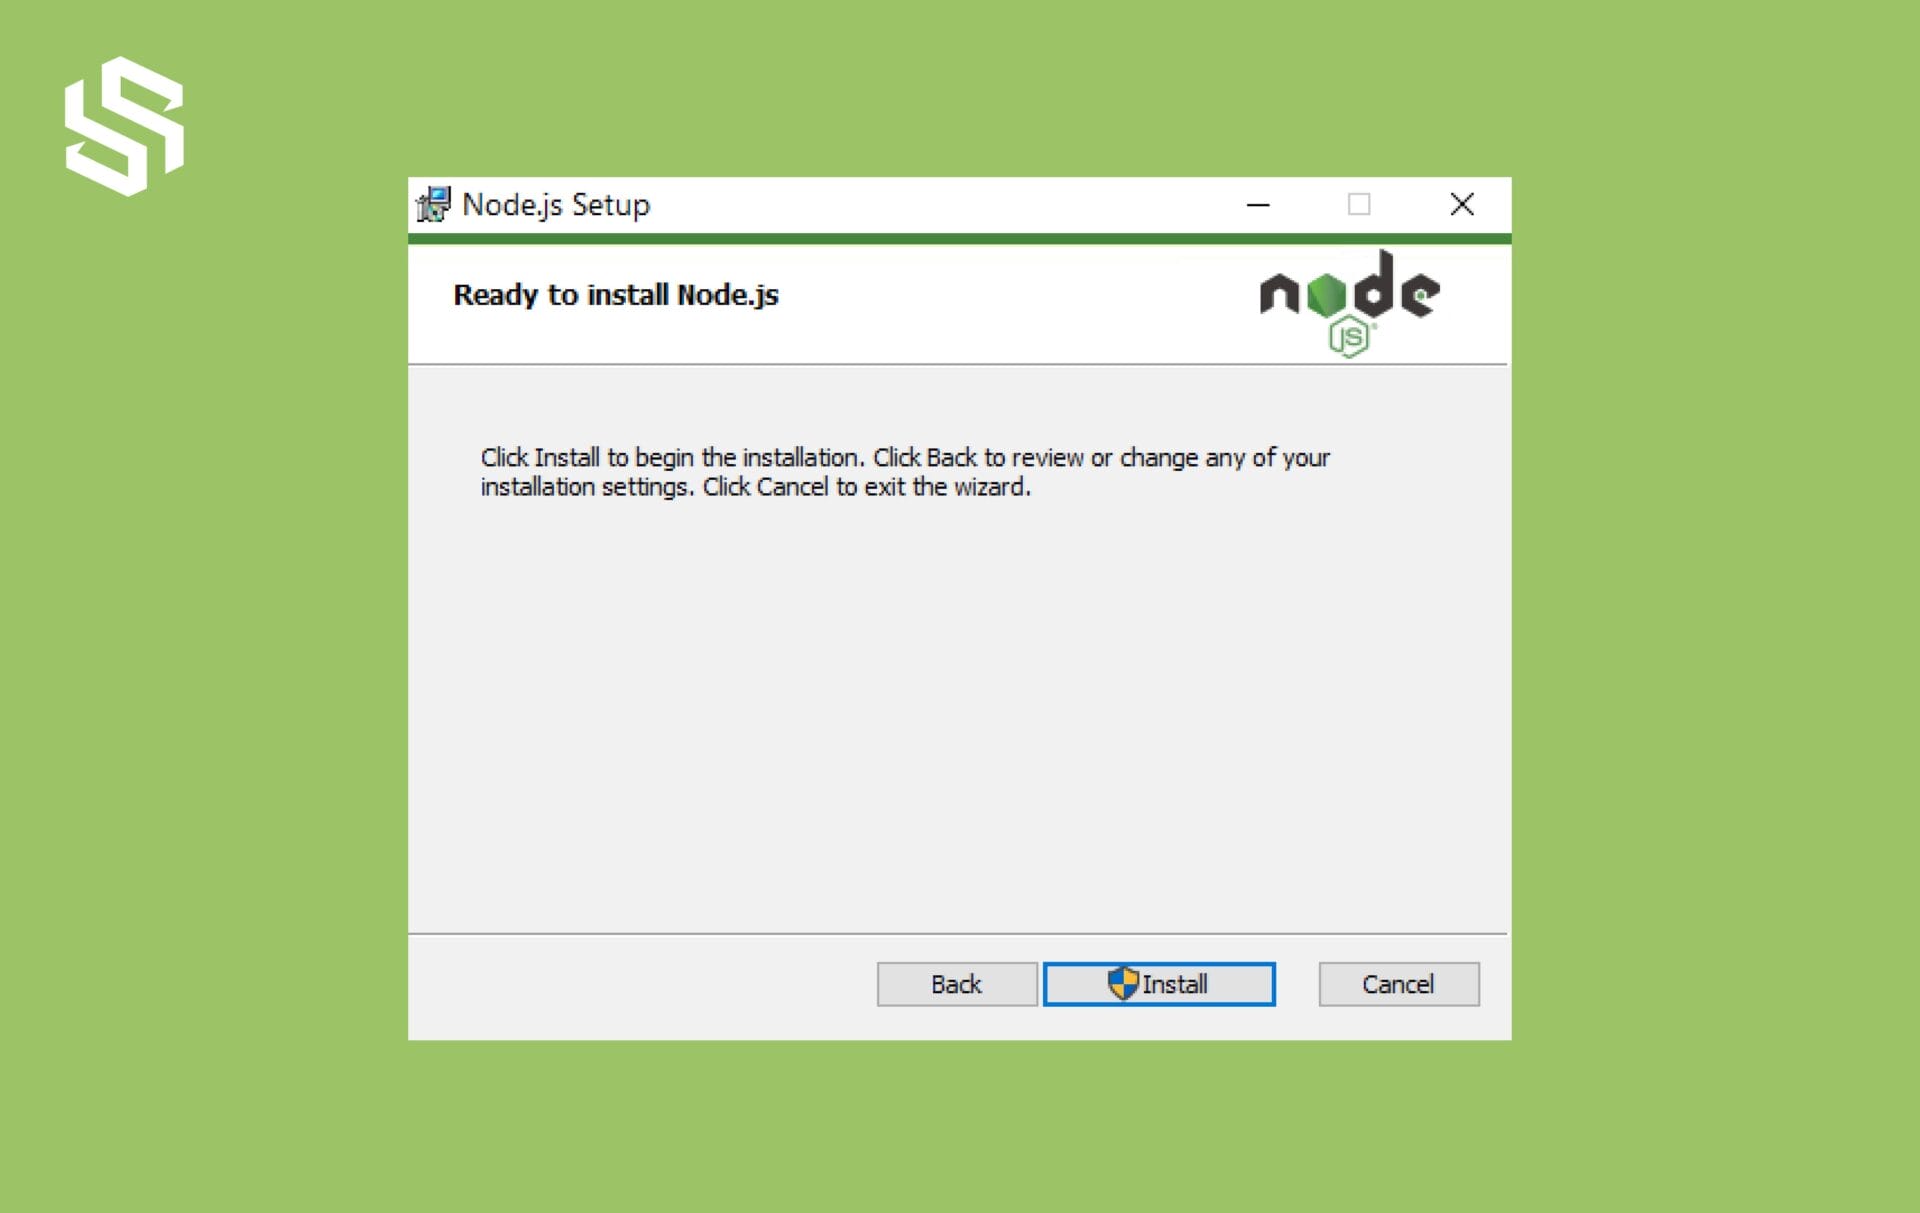
On the “Ready to install” screen, review your installation preferences. If everything looks correct, click “Install” to begin the installation process.
The installer will now extract and install Node.js on your system. This process may take a few minutes.
Once the installation is complete, the Node.js Setup Wizard will display the “Completing the Node.js Setup Wizard” screen.
Need help building a production-grade web application with Angular? Our team of Angular experts is here to guide you through the process.
Step 2: Open Command Prompt
Once Node.js is installed, open the Command Prompt. You can do this by pressing the Windows key + R, typing cmd, and pressing Enter.
You can also use windows Powershell
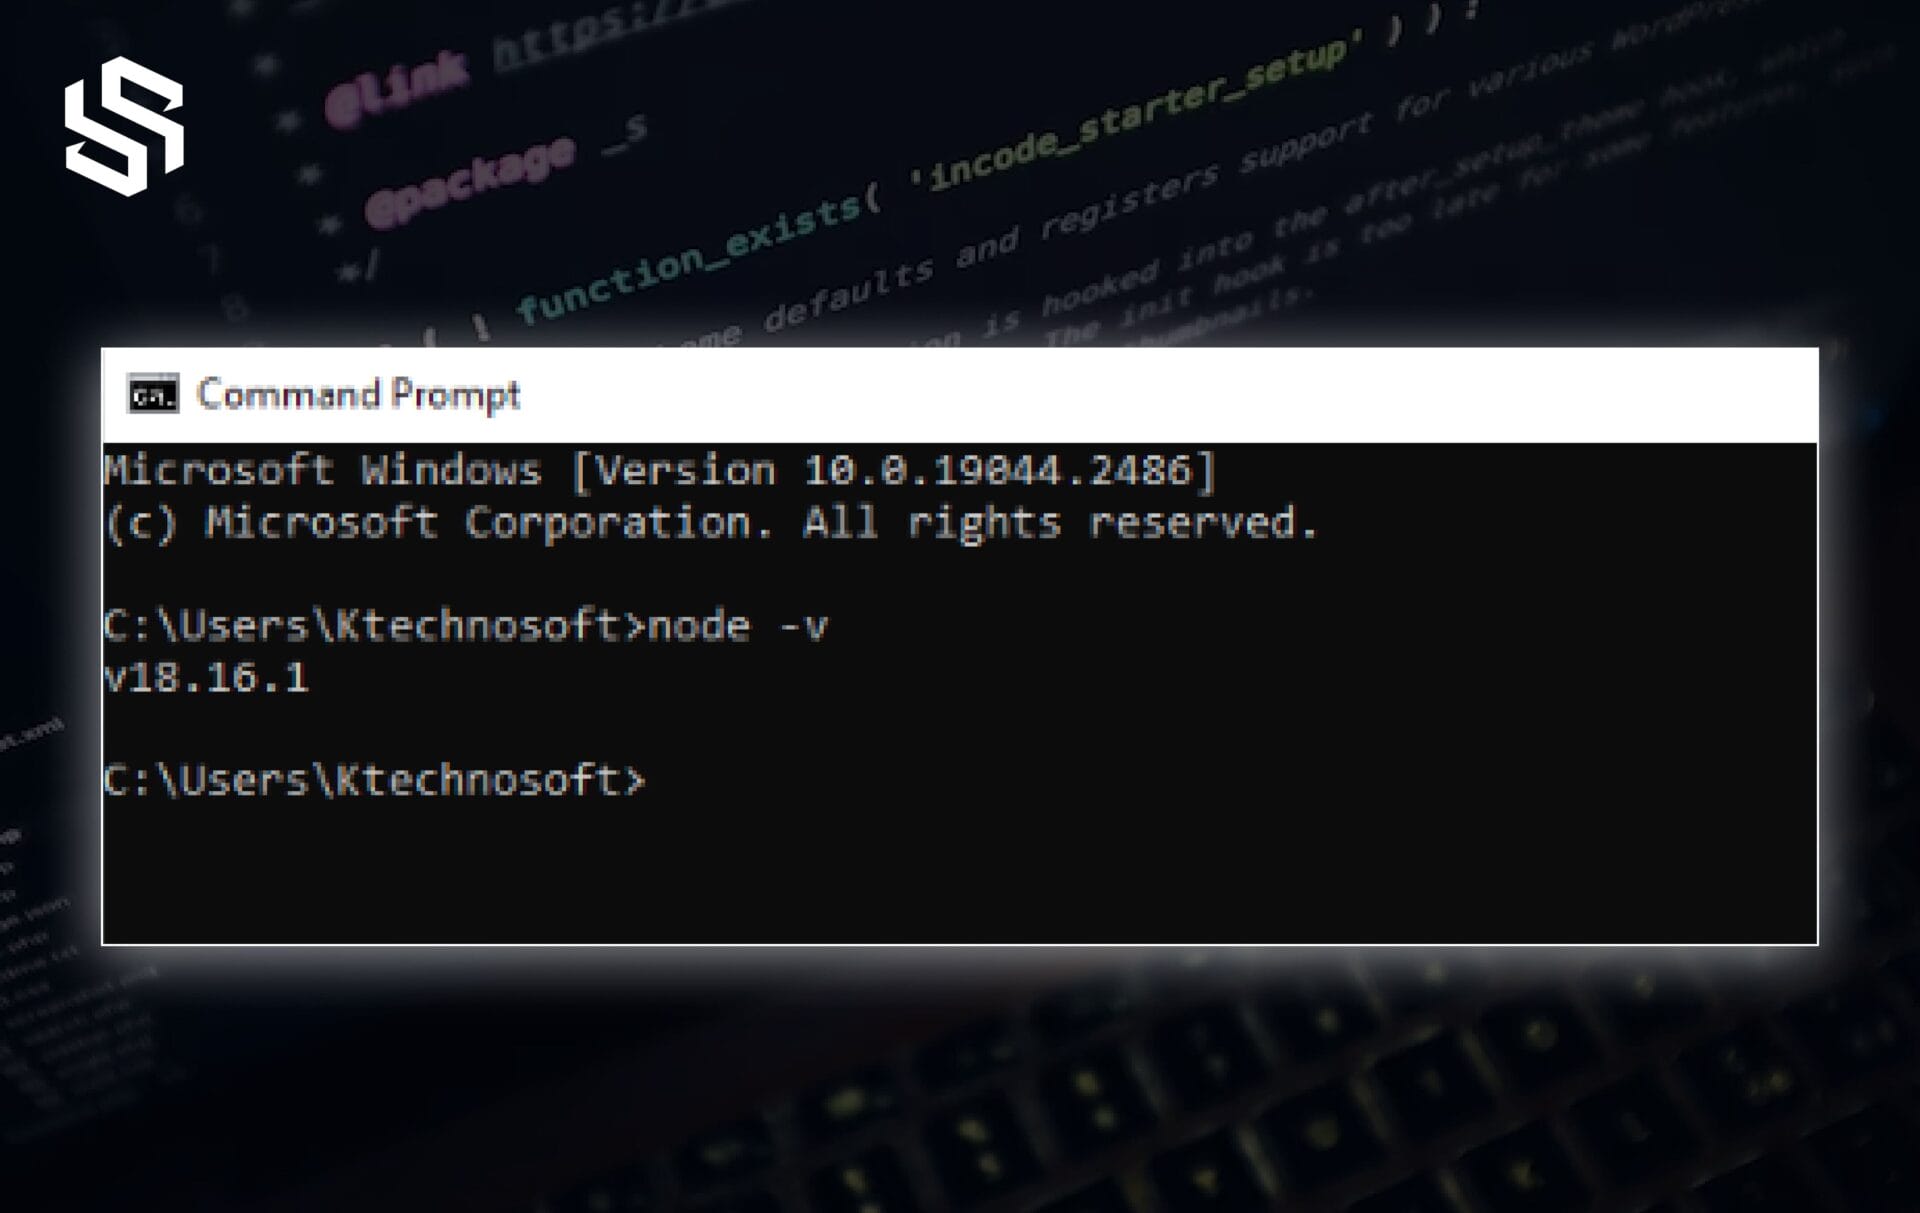
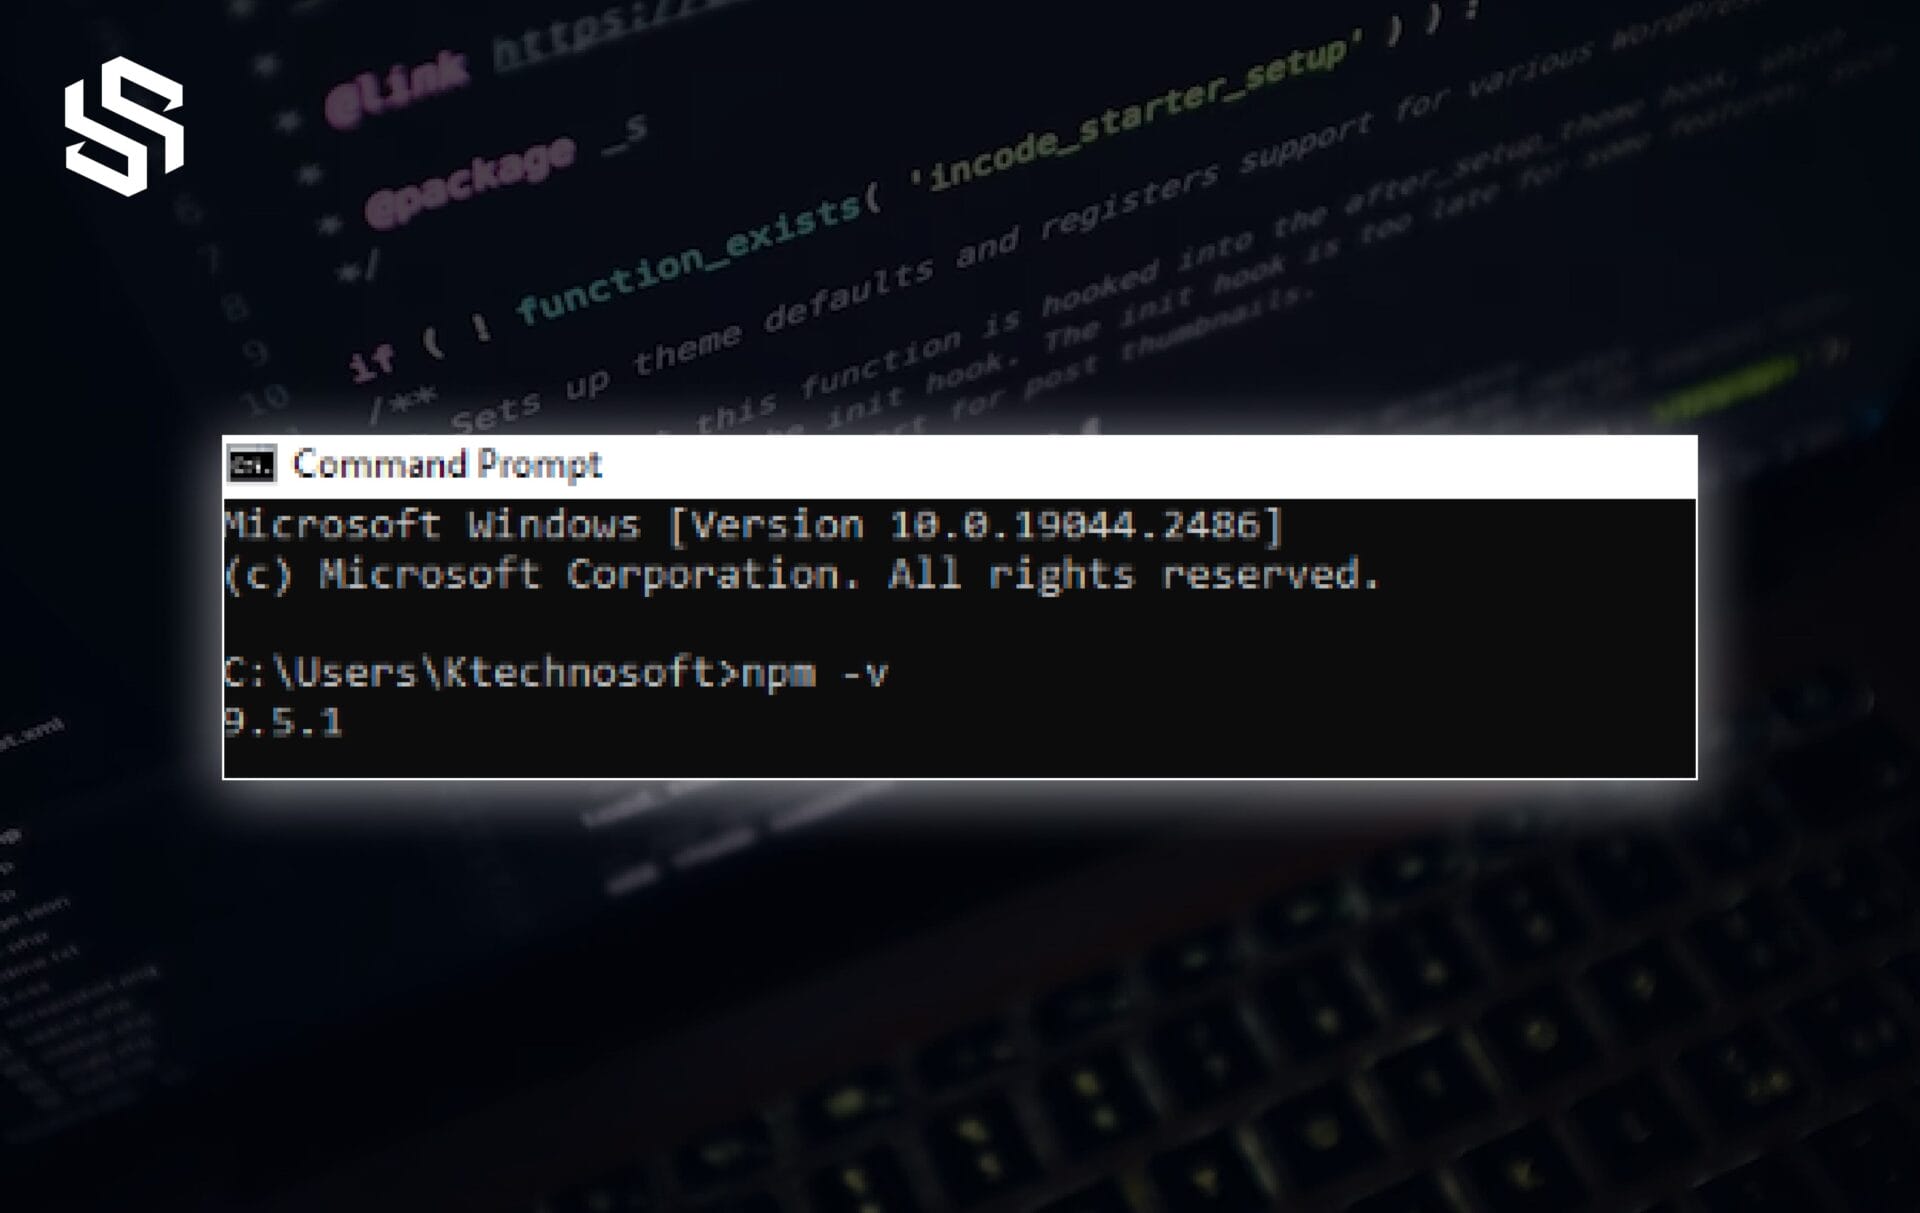
Step 3: Verify Node.js and NPM installation
To ensure that Node.js and NPM (Node Package Manager) are installed correctly, open a terminal or command prompt and type the following commands:
For Node.js:
node -v
For NPM:
npm -v
Step 4: Install TypeScript (Not Necessary)
In Angular.js development, TypeScript plays a crucial role as it is the recommended language for building Angular applications. TypeScript is a superset of JavaScript that adds static typing and additional features to JavaScript, making it more robust and easier to work with for larger-scale applications.
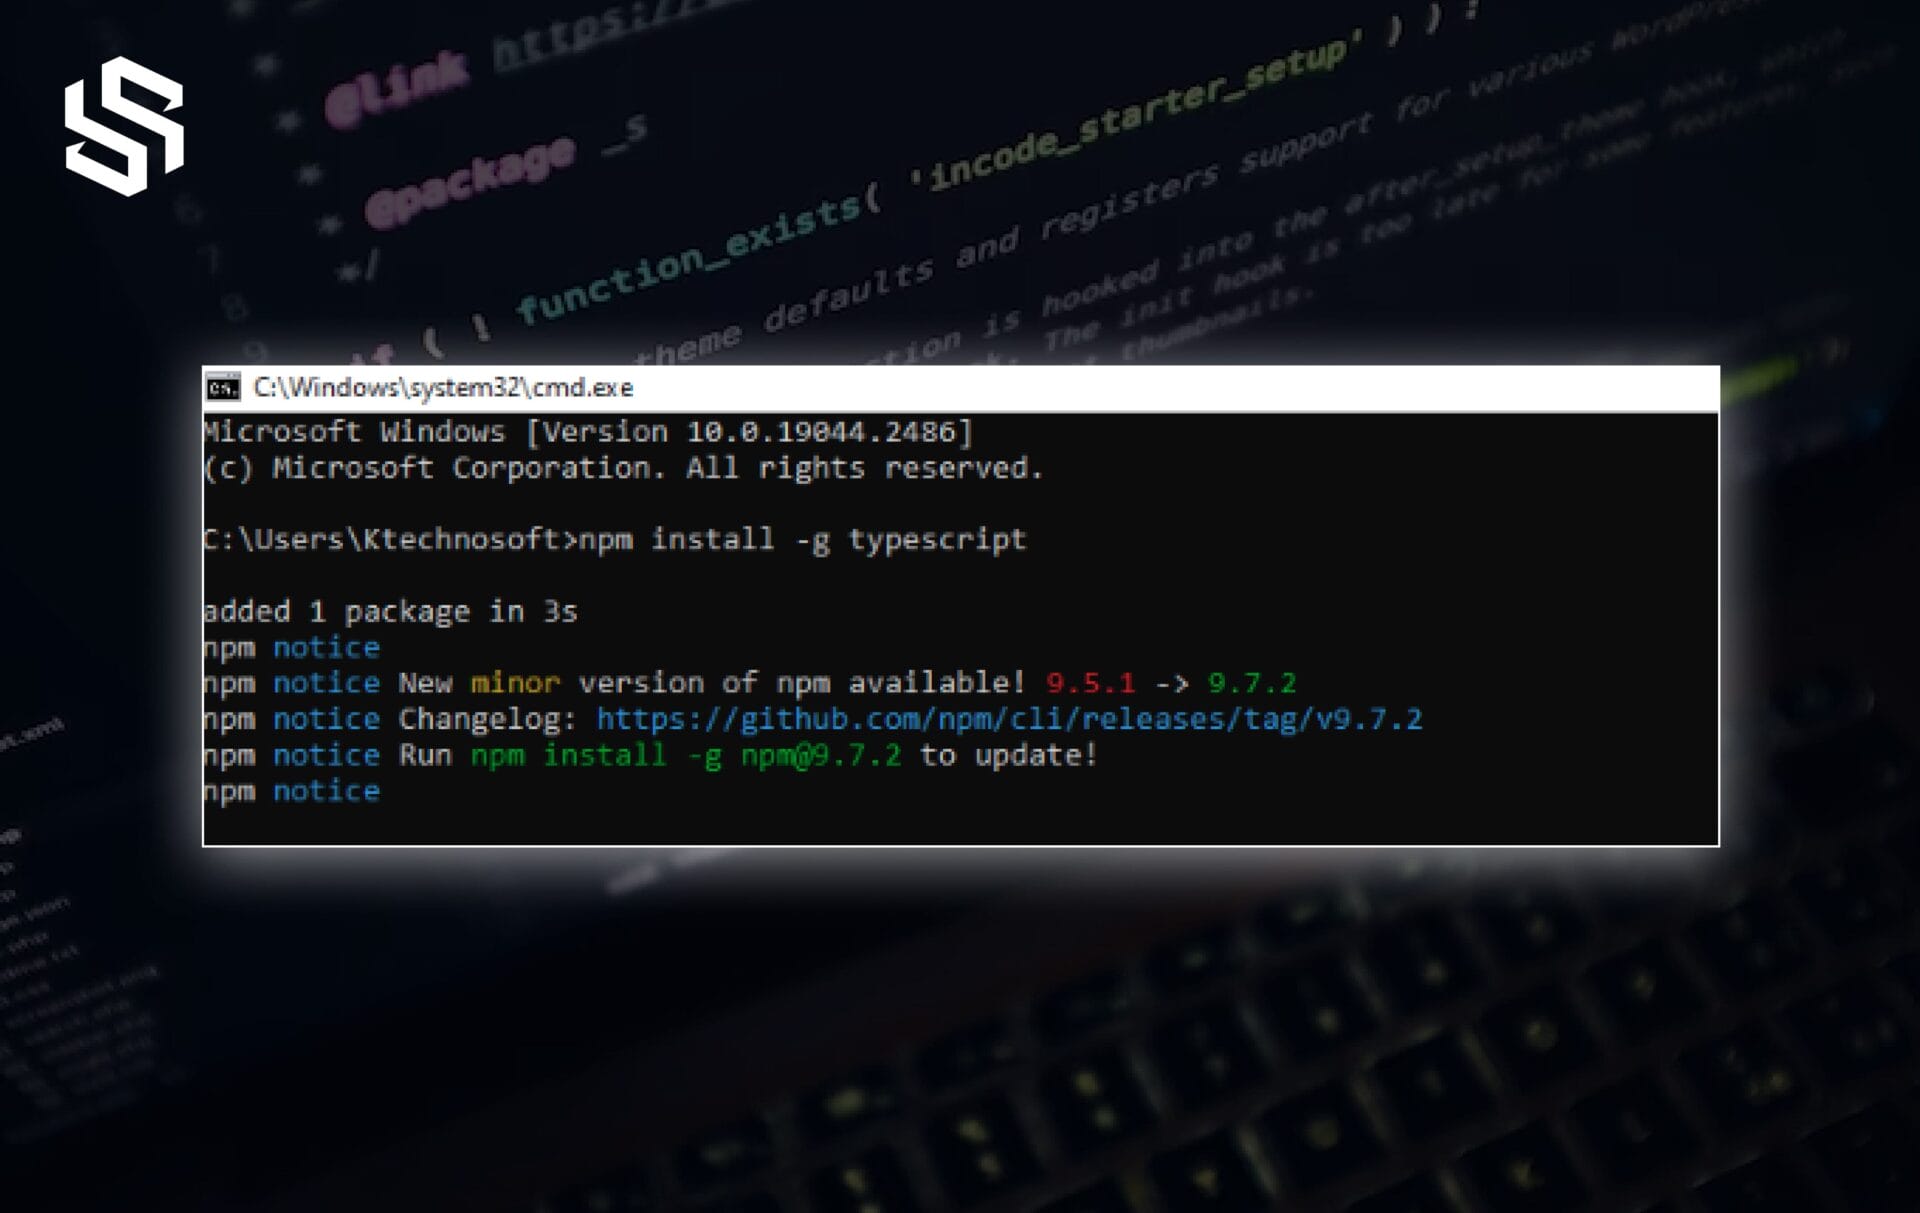
So, once Node.js is installed, you can use npm (Node Package Manager) to install TypeScript globally on your system. Open a command prompt or terminal and run the following command:
npm install -g typescript
This command will download and install TypeScript globally on your system.
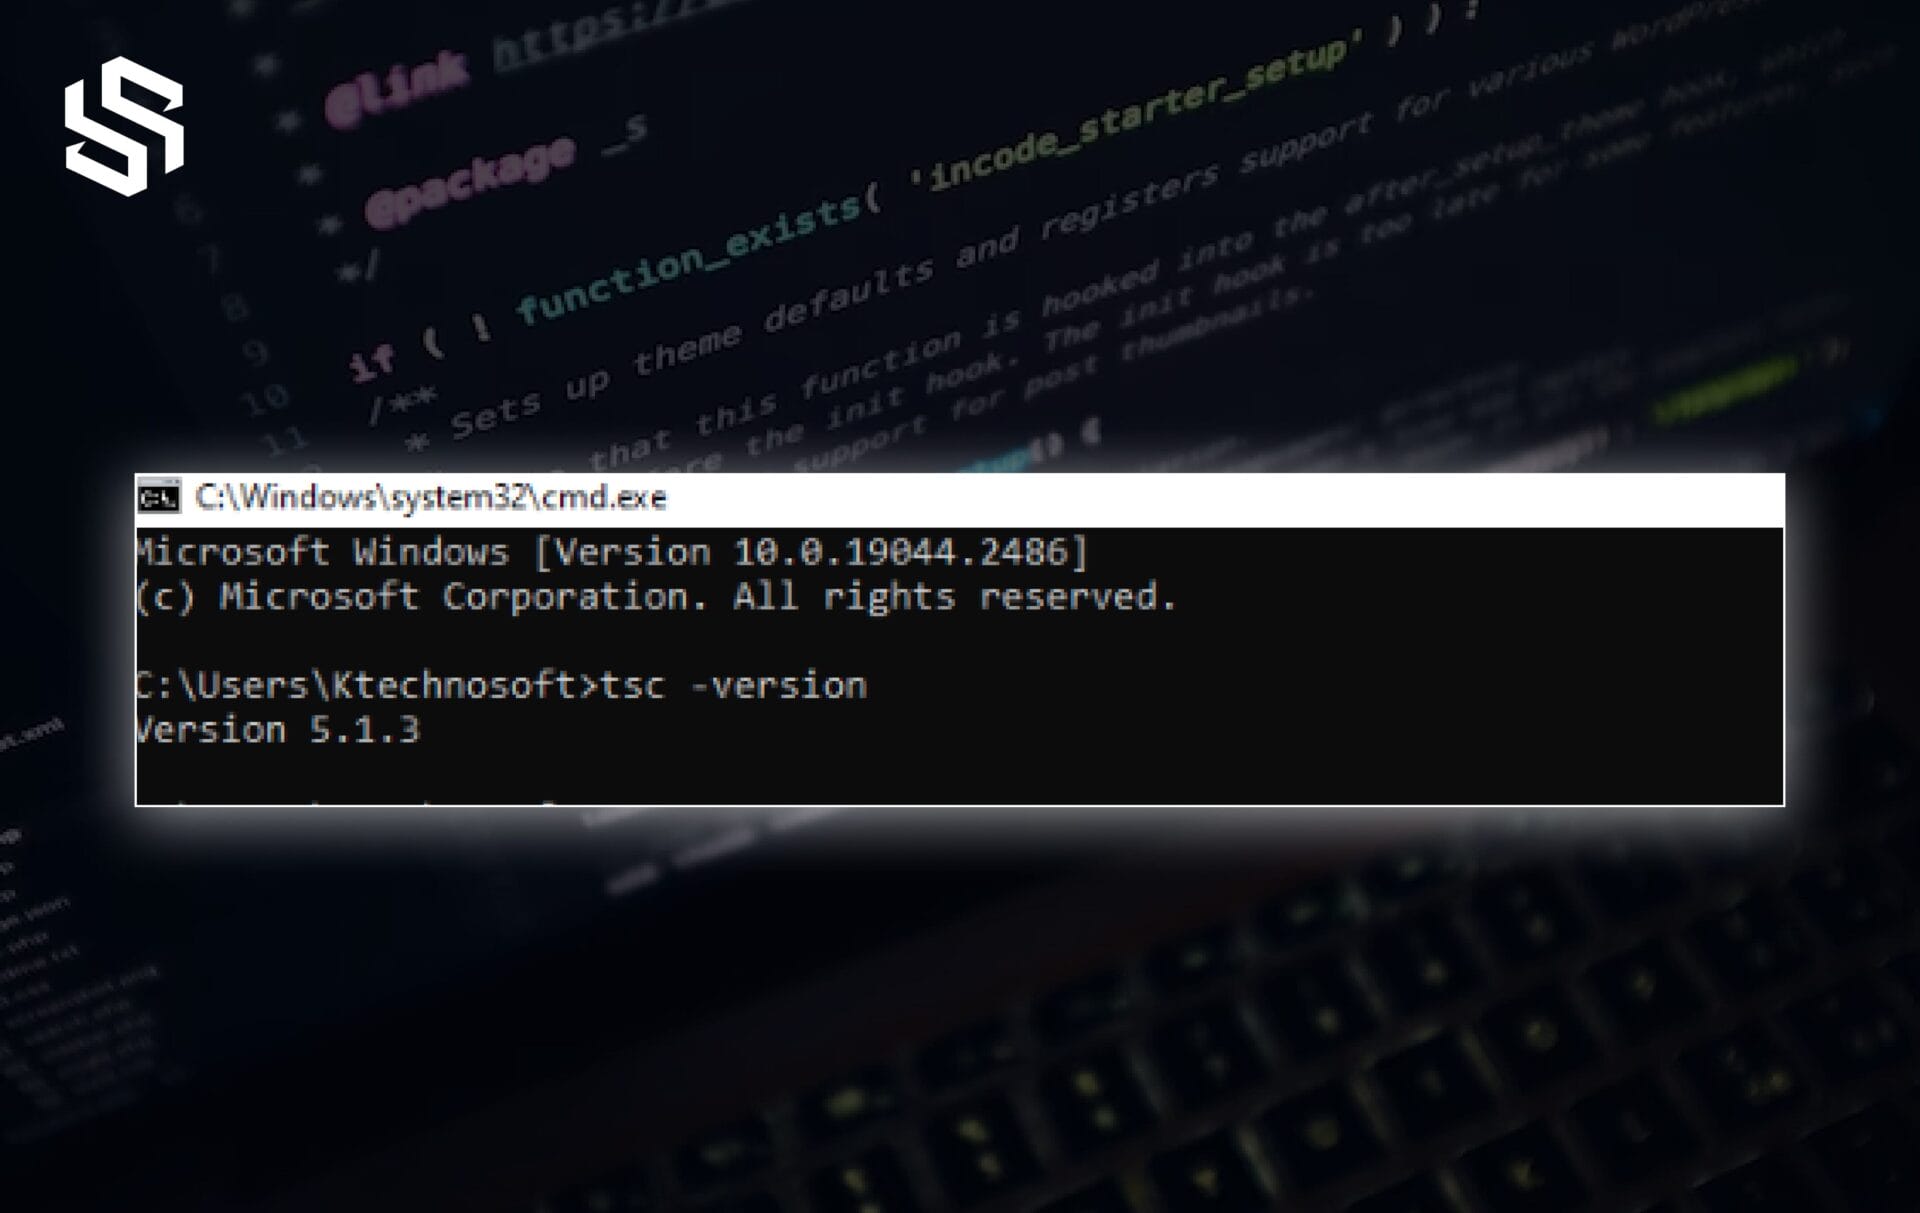
To verify that TypeScript has been installed successfully, run the following command:
tsc -version
This command will display the installed TypeScript version if the installation was successful.
That’s it! TypeScript is now installed on your system. You can start using it to write and compile TypeScript code.
Mastering Single Page Applications: A Complete Guide
Step 5: Install Angular CLI
Angular CLI (Command Line Interface) is a powerful tool provided by the Angular team that simplifies the development process of Angular applications. It is a command-line tool that offers a wide range of features and benefits to Angular developers. Here’s why you should use Angular CLI:
- Project Generation
- Code Generation
- Development Server
- Build and Optimization
- Testing Support
- Configuration Management
- Seamless Upgrades
- Integration with Tooling
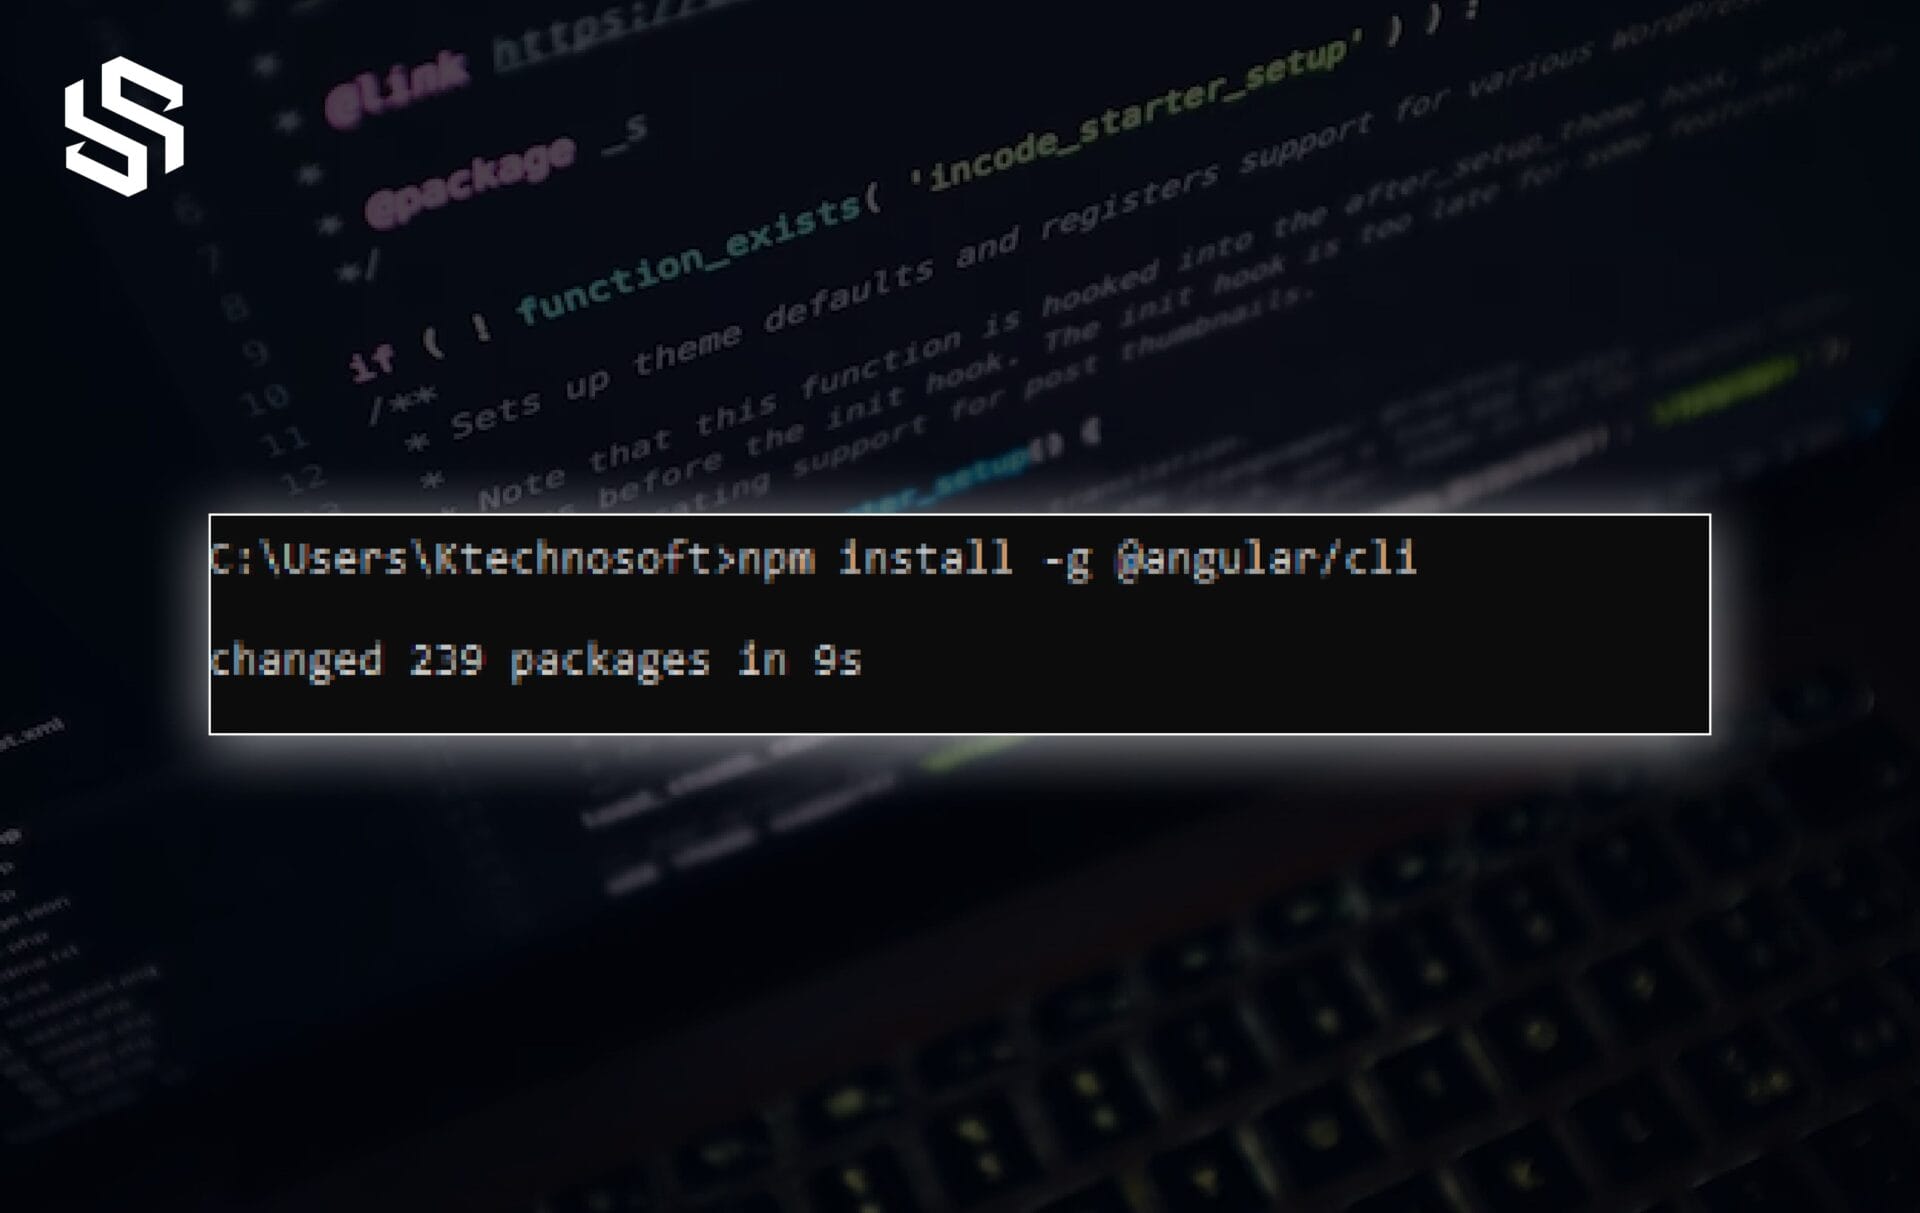
To install Angular, we first need to install Angular CLI (Command Line Interface) using npm. In the Command Prompt, type the following command and press Enter:
npm install -g @angular/cli
This command installs Angular CLI globally on your system.
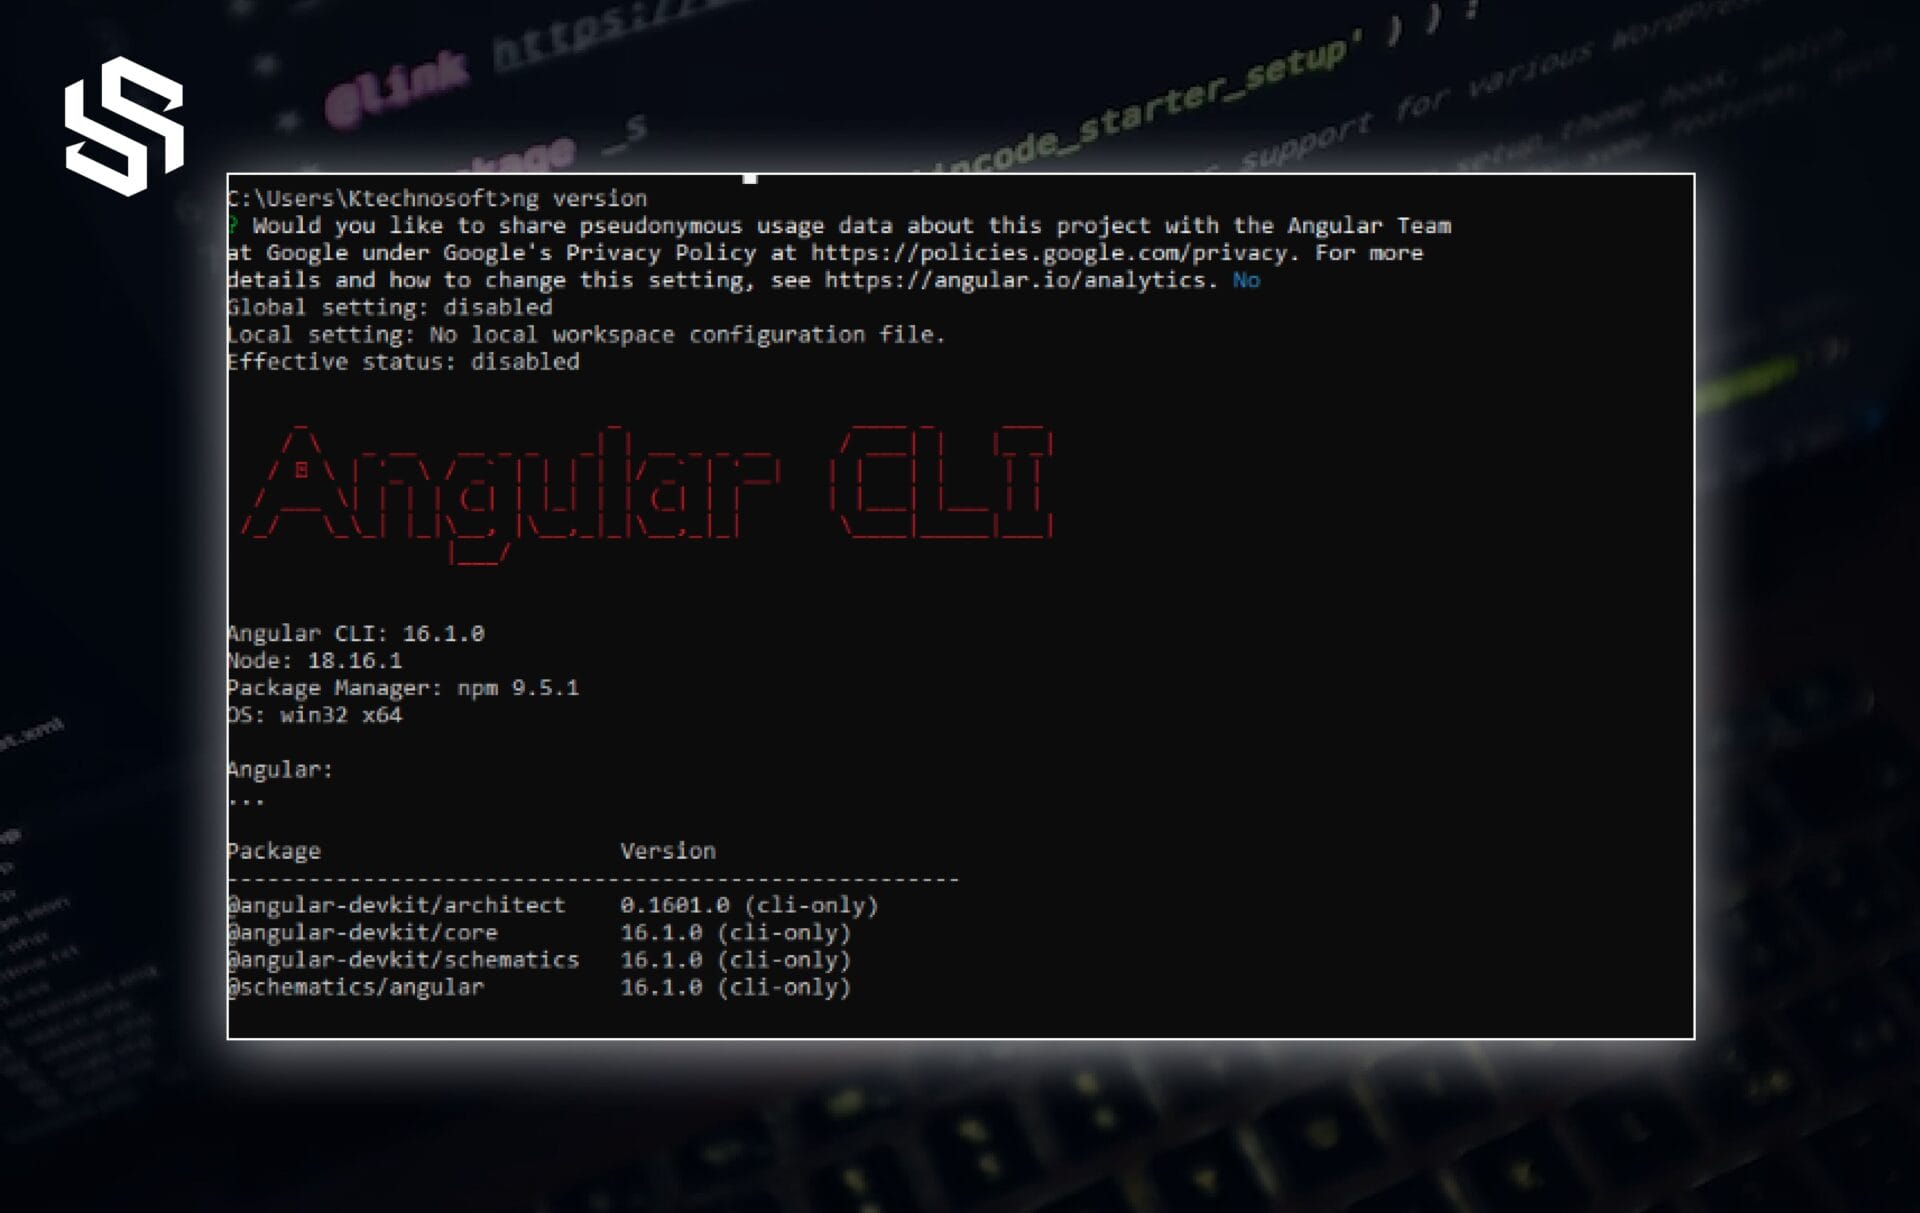
To verify the installed version after the installation, please use the following command:
ng version
Or
During the installation process, the system will prompt you to indicate whether you wish to share usage data with the Angular Team. Please choose either ‘Y’ for yes or ‘N’ for no. Your selection will not impact the functionality of the system.
Looking for Angular developers who can build a top-notch PWA?
Hire Dedicated Angular.js Developers
Step 6: Create a New Angular Project
To create a new Angular project, navigate to the directory where you want to create the project in the Command Prompt. Then, type the following command and press Enter:
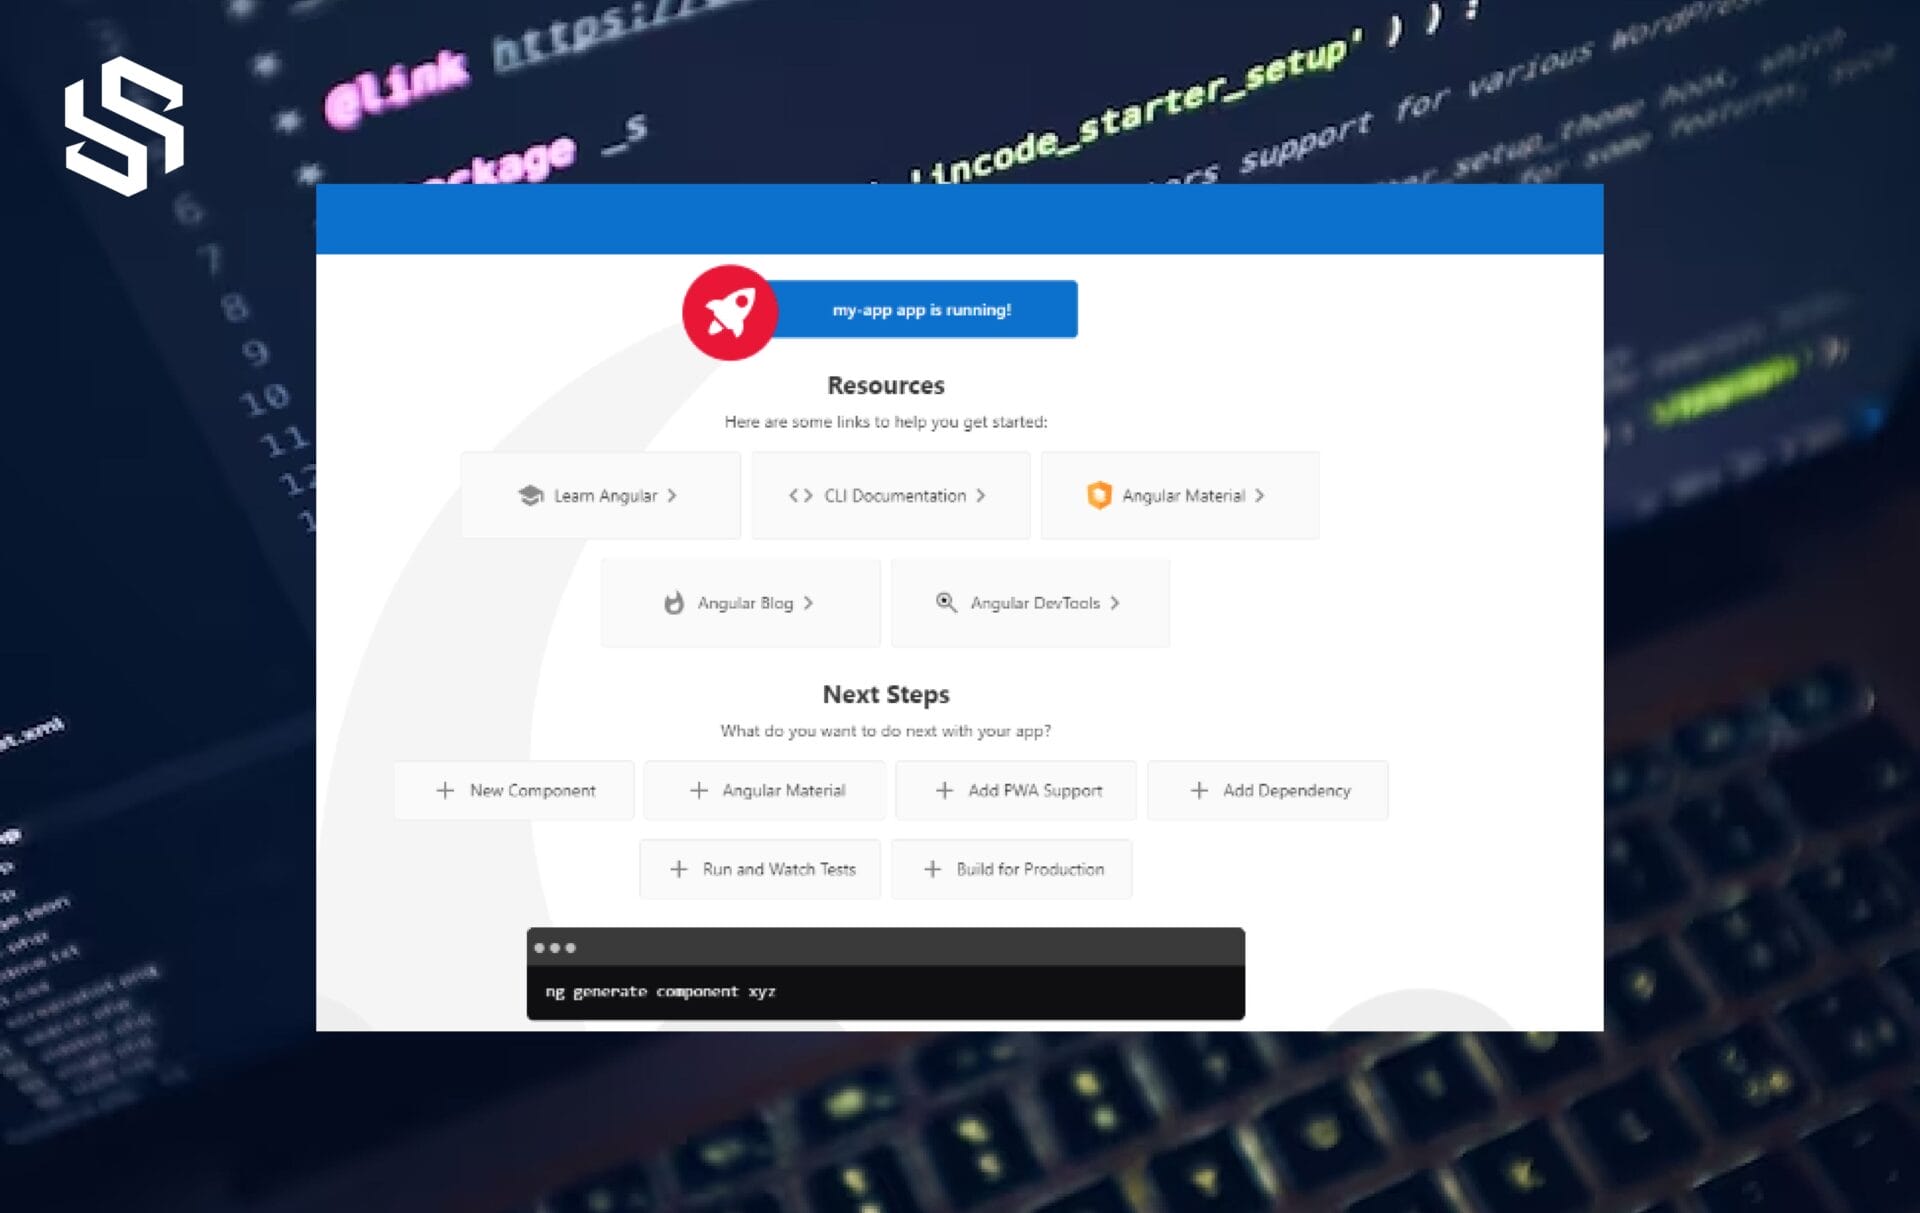
ng new my-app
After executing the code, you will encounter two questions:
1. Do you want to include Angular routing?
Press ‘Y’ if you want to create a multi-page website, or press ‘N’ otherwise.
2. Select the stylesheet format of your choice.
Here, we are selecting CSS as the preferred stylesheet format, but you can choose according to your specific needs.
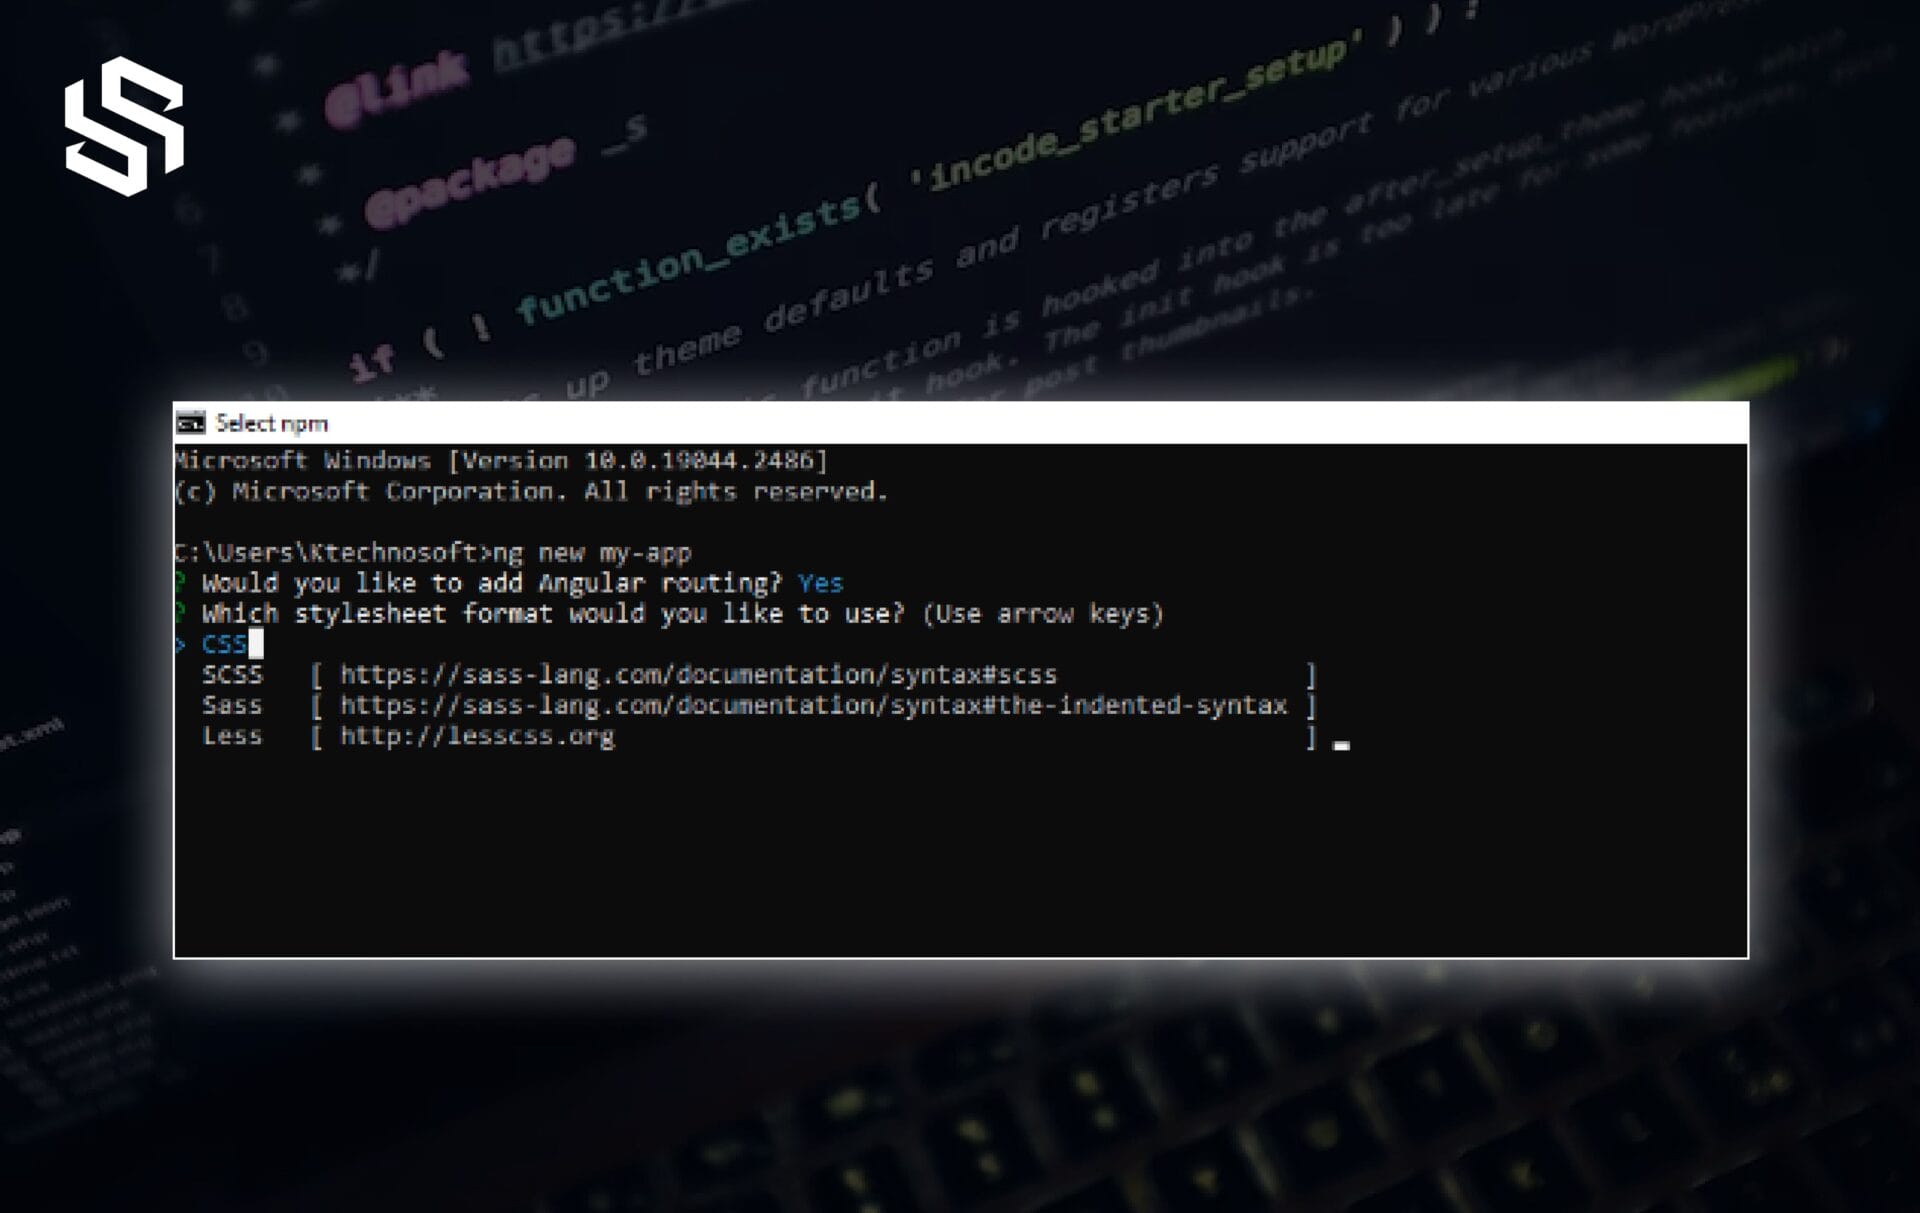
This command creates a new Angular project named “my-app” in the current directory.
Step 7: Serve the Angular Application
Navigate to the project directory by typing the following command in the Command Prompt:
cd my-app

Then, type the following command to serve the application:
ng serve
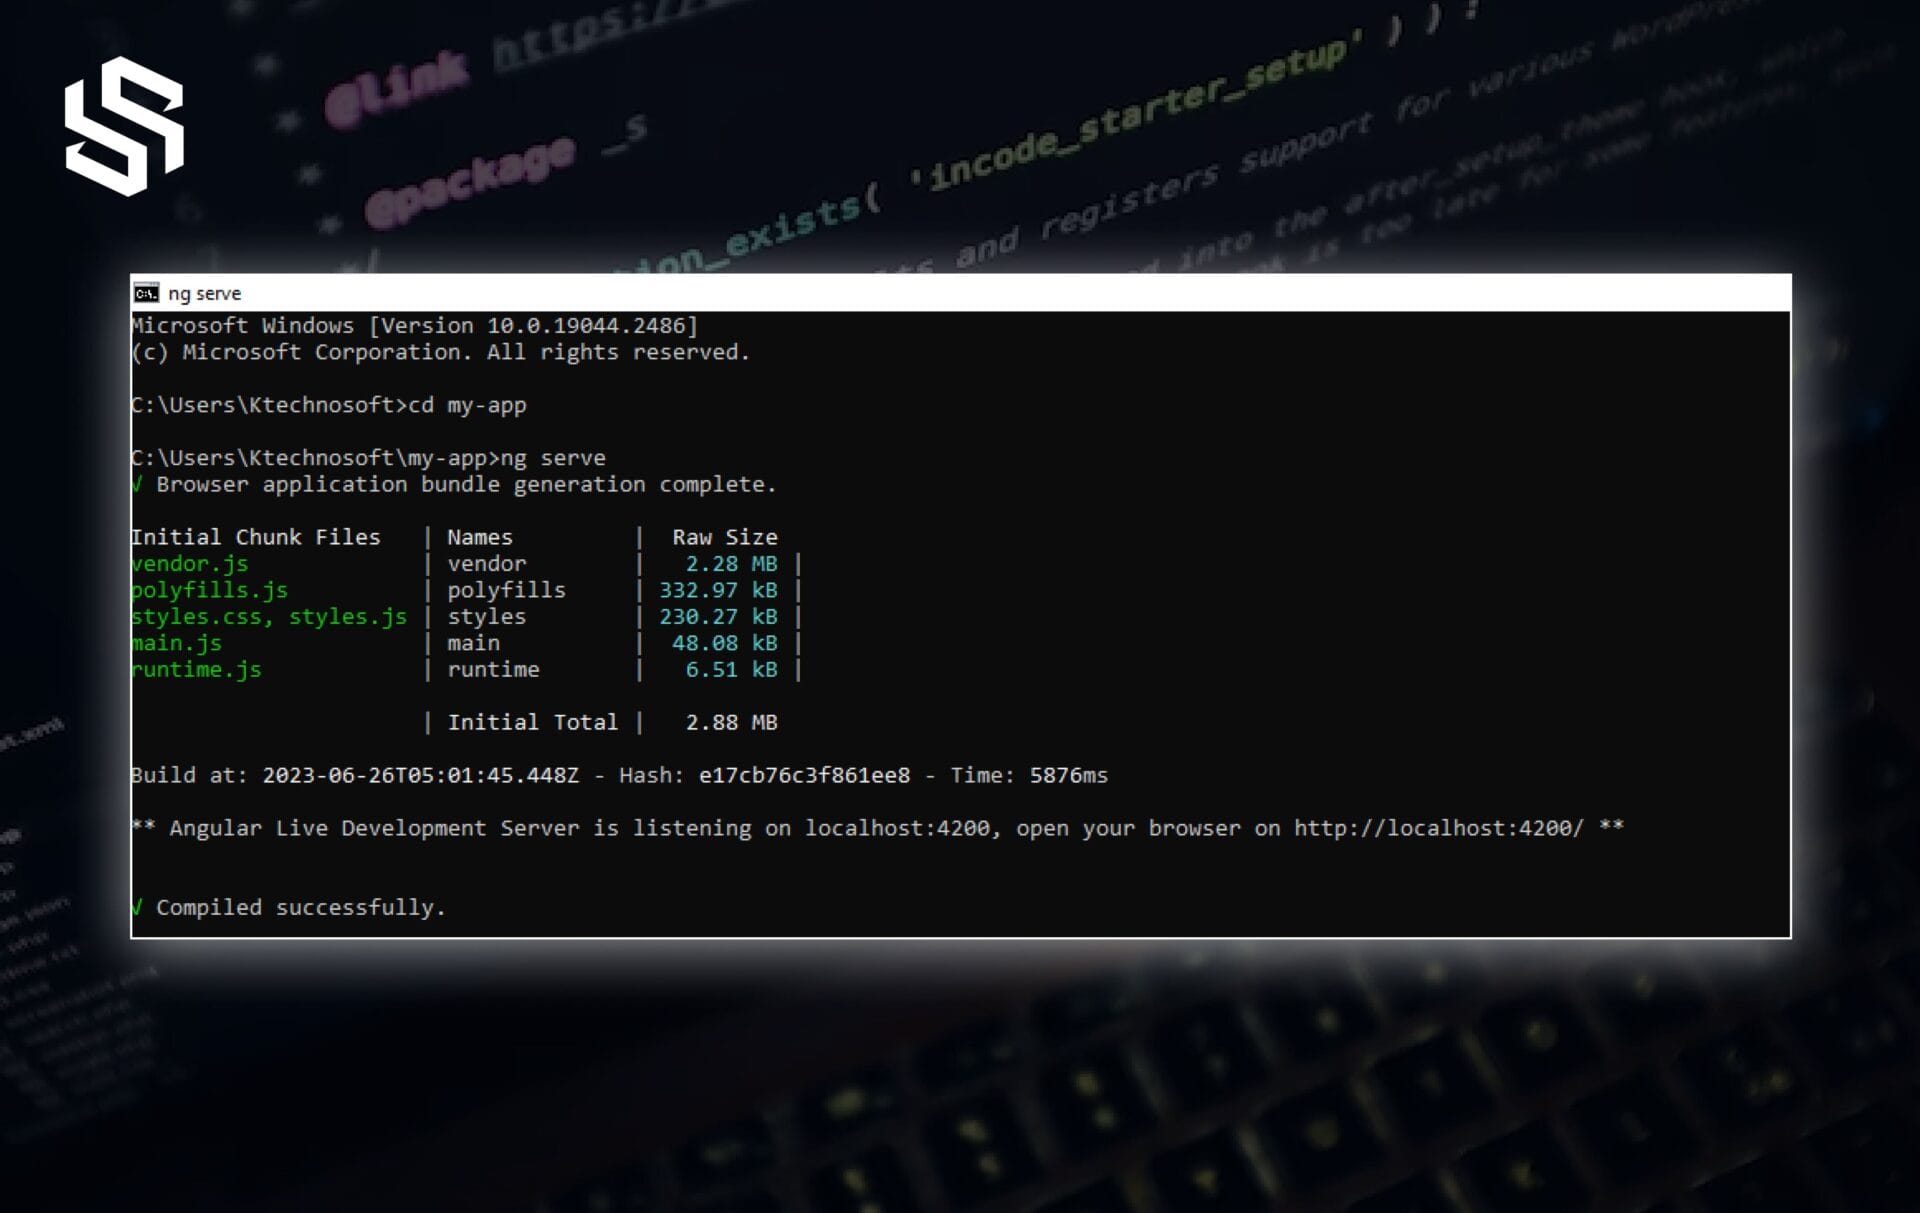
This command compiles the application and opens it in your default browser.
Please keep the Windows Command Prompt running, as you can utilize this terminal for making changes. Any modifications you make will be instantly reflected in the application displayed in your browser.
To automatically open your browser and navigate to the http://localhost:4200 address, use the –open option (or -o for short).
Now you can begin creating new Angular components.
NOTE:
If you found error between the installation like, Could not find the ‘@angular-devkit/build-angular:dev-server’ builder’s node package. It is a dev dependency, which is a newly introduced package in Angular 6.0, execute the following command:
Run Command:
npm install –save-dev @angular-devkit/build-angular
This will add the package to your project’s dependencies and make it available for development purposes.
In conclusion, installing Angular on Windows is not a complicated process. By following the above steps, you can easily install Angular and start developing your web application.
How to Hire Custom App Developers: An Ultimate Guide
Conclusion
The process of installing Angular on Windows is rather easy, and it only requires the execution of a few simple steps. Developers may rapidly begin working with Angular.js by installing the required prerequisites, such as Node.js and npm, and then utilizing the Angular CLI (Command Line Interface). Once Angular is set up, developers may benefit from its strong capabilities and create dependable web apps.
If you’re looking to hire AngularJS developers or need assistance with AngularJS projects, consider Syndell, a leading AngularJS development company. We offer custom AngularJS development services, and our team of experienced developers can provide expert guidance and support. Contact us at Syndell to discuss your requirements and harness the power of AngularJS for your web development needs.


